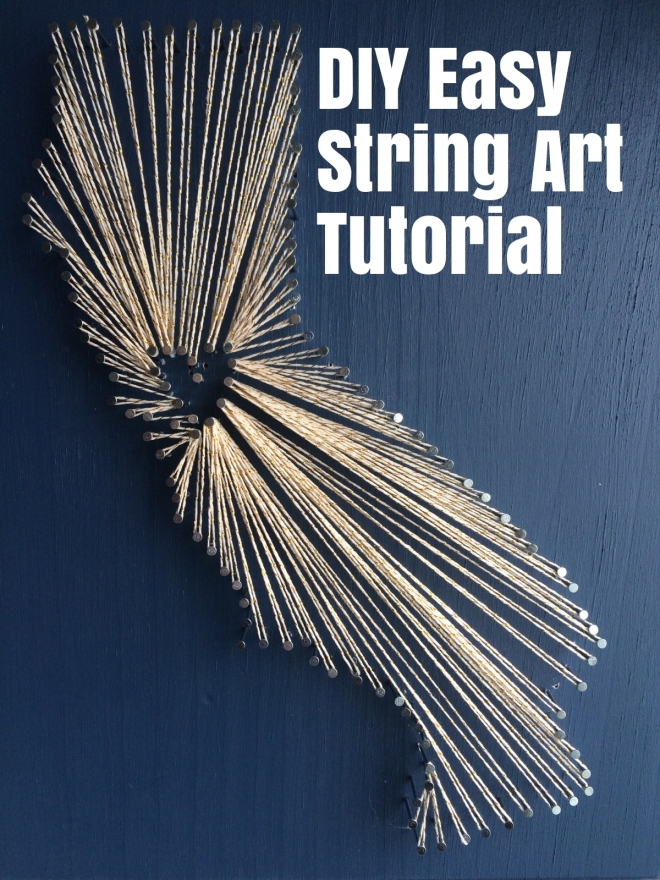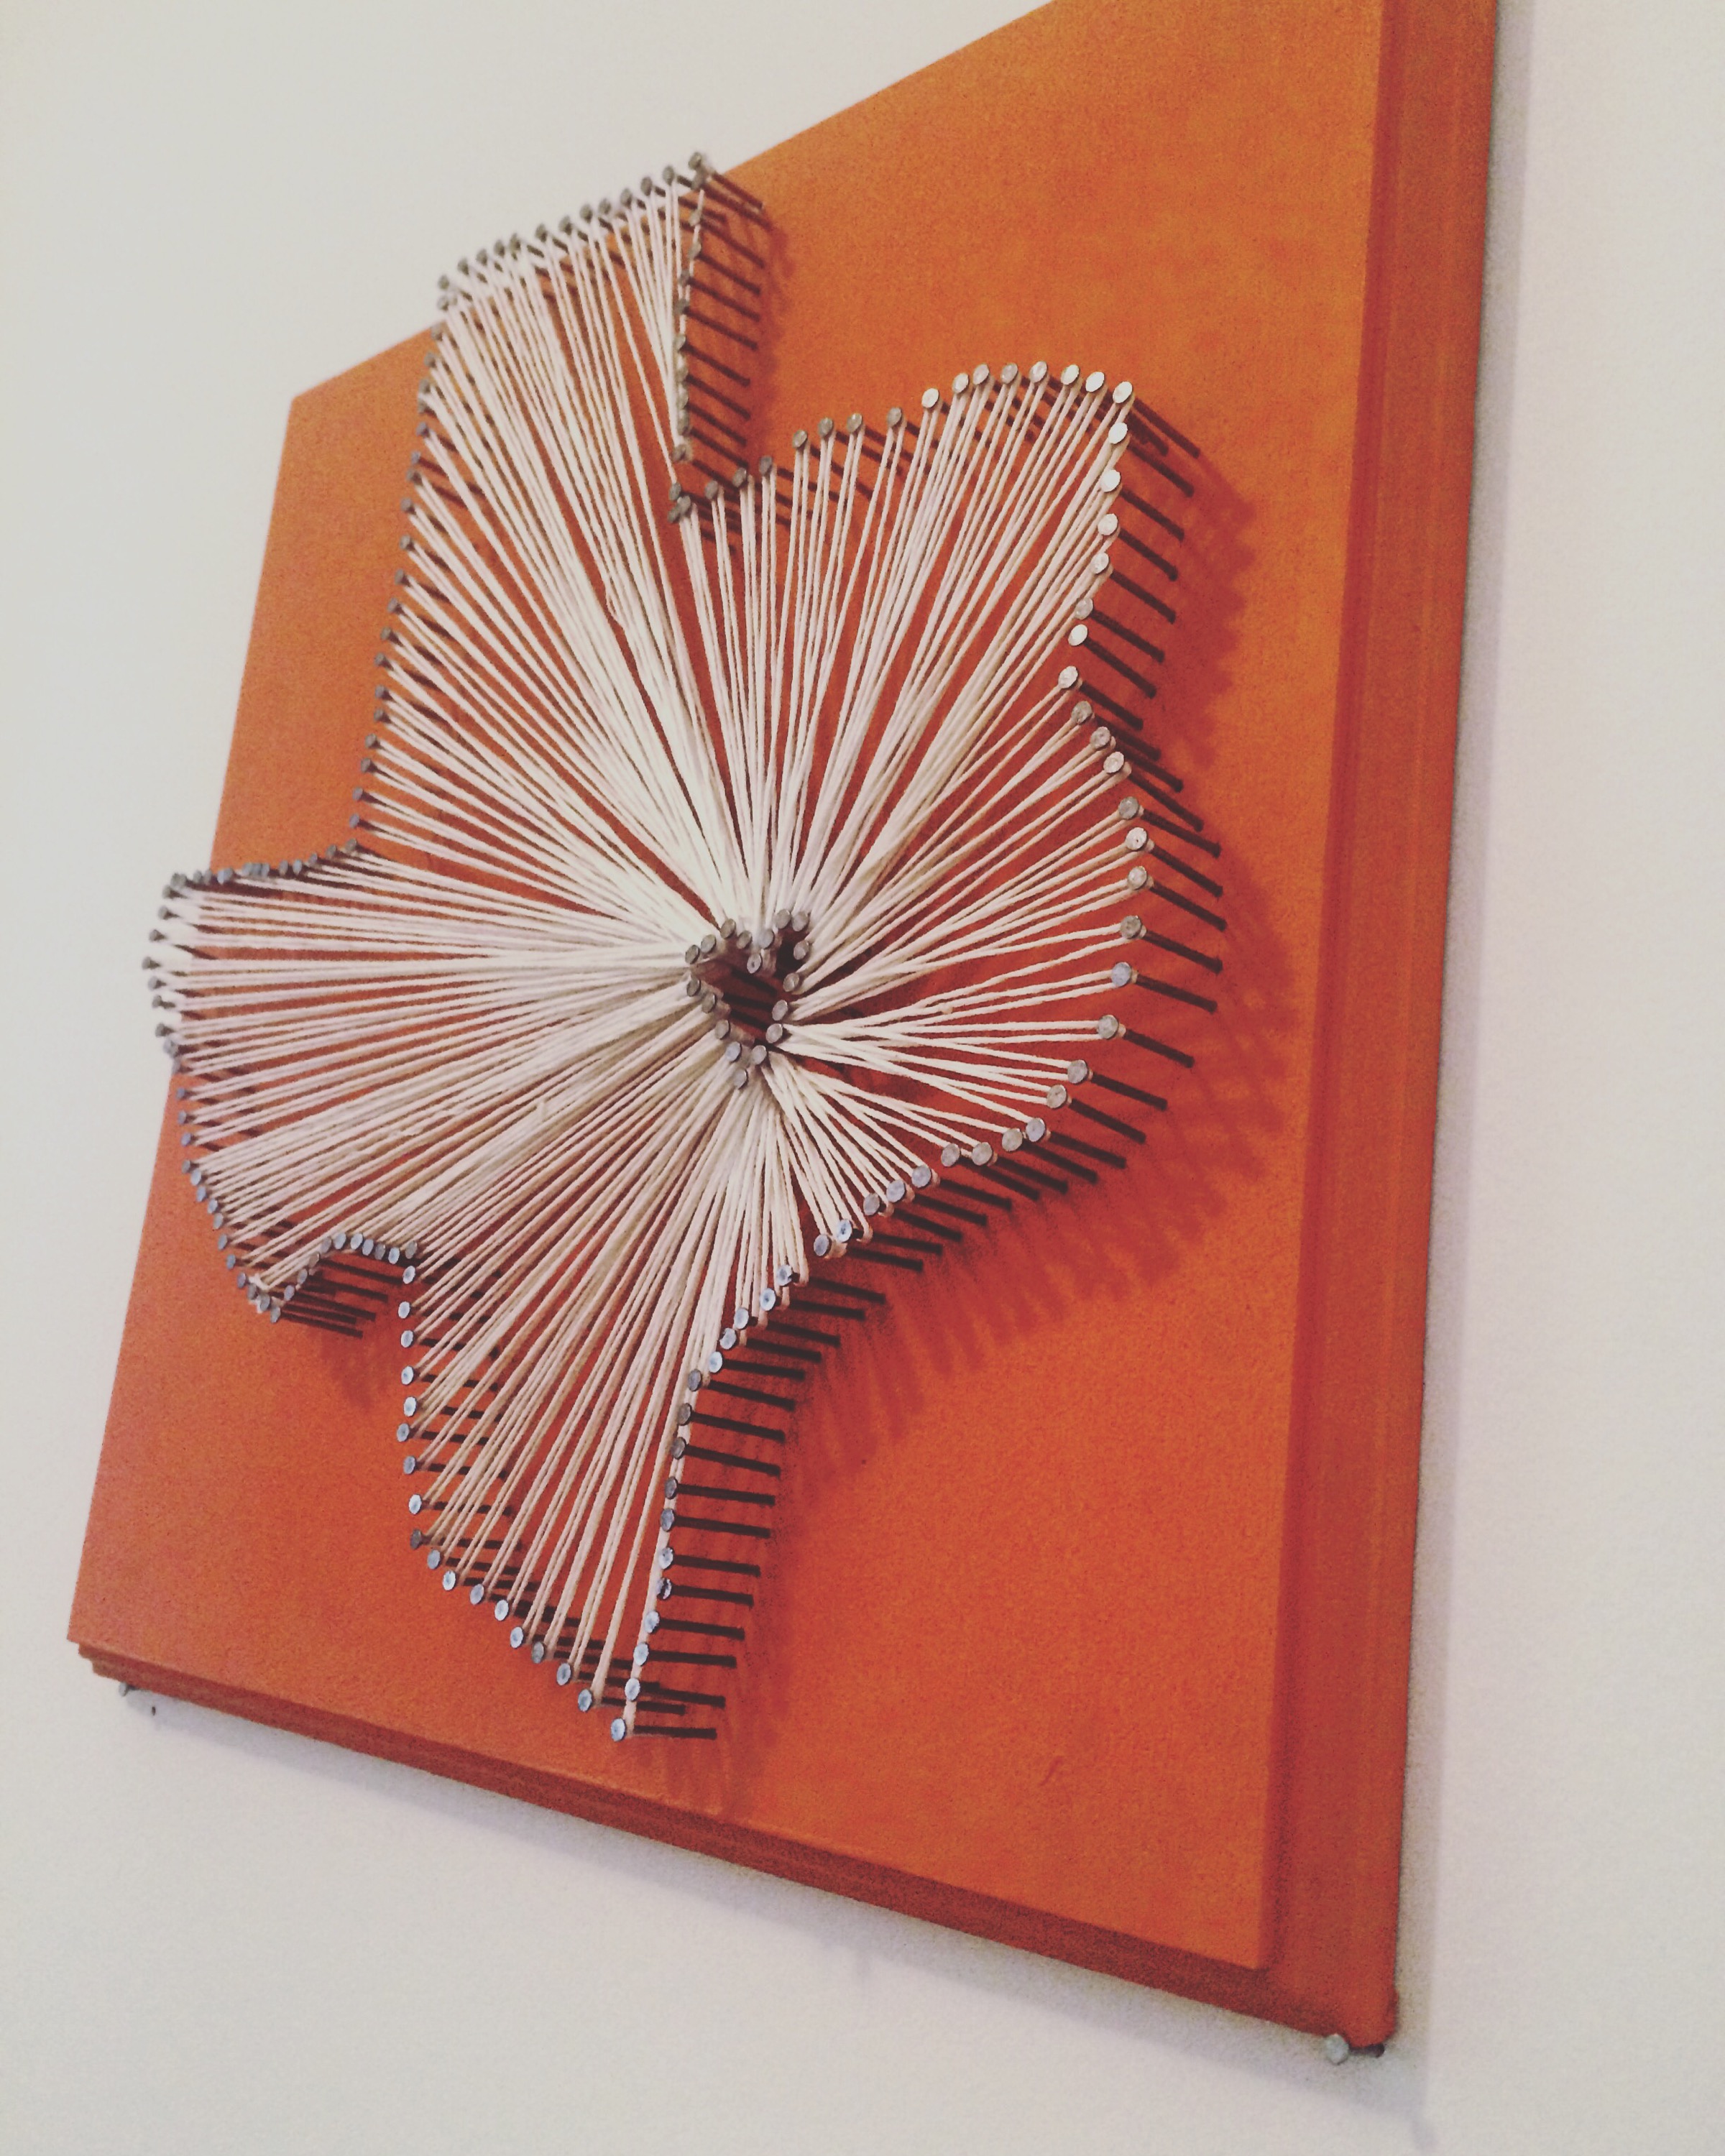
Four years ago I made this Texas string art for Chris’ birthday; It was a surprisingly easy project that turned out great & now I’ve inally gotten around to make the California counterpart. Whether you’re gifting this for the holidays or hanging it in your own home it’s sure to get plenty of compliments.

Materials
- Wood board – I used this one here from Michaels
- 1″ nails (2 packs recommended)
- Paint
- Foam brush
- Hammer
- String
- Outline of map or design you plan to use
Directions
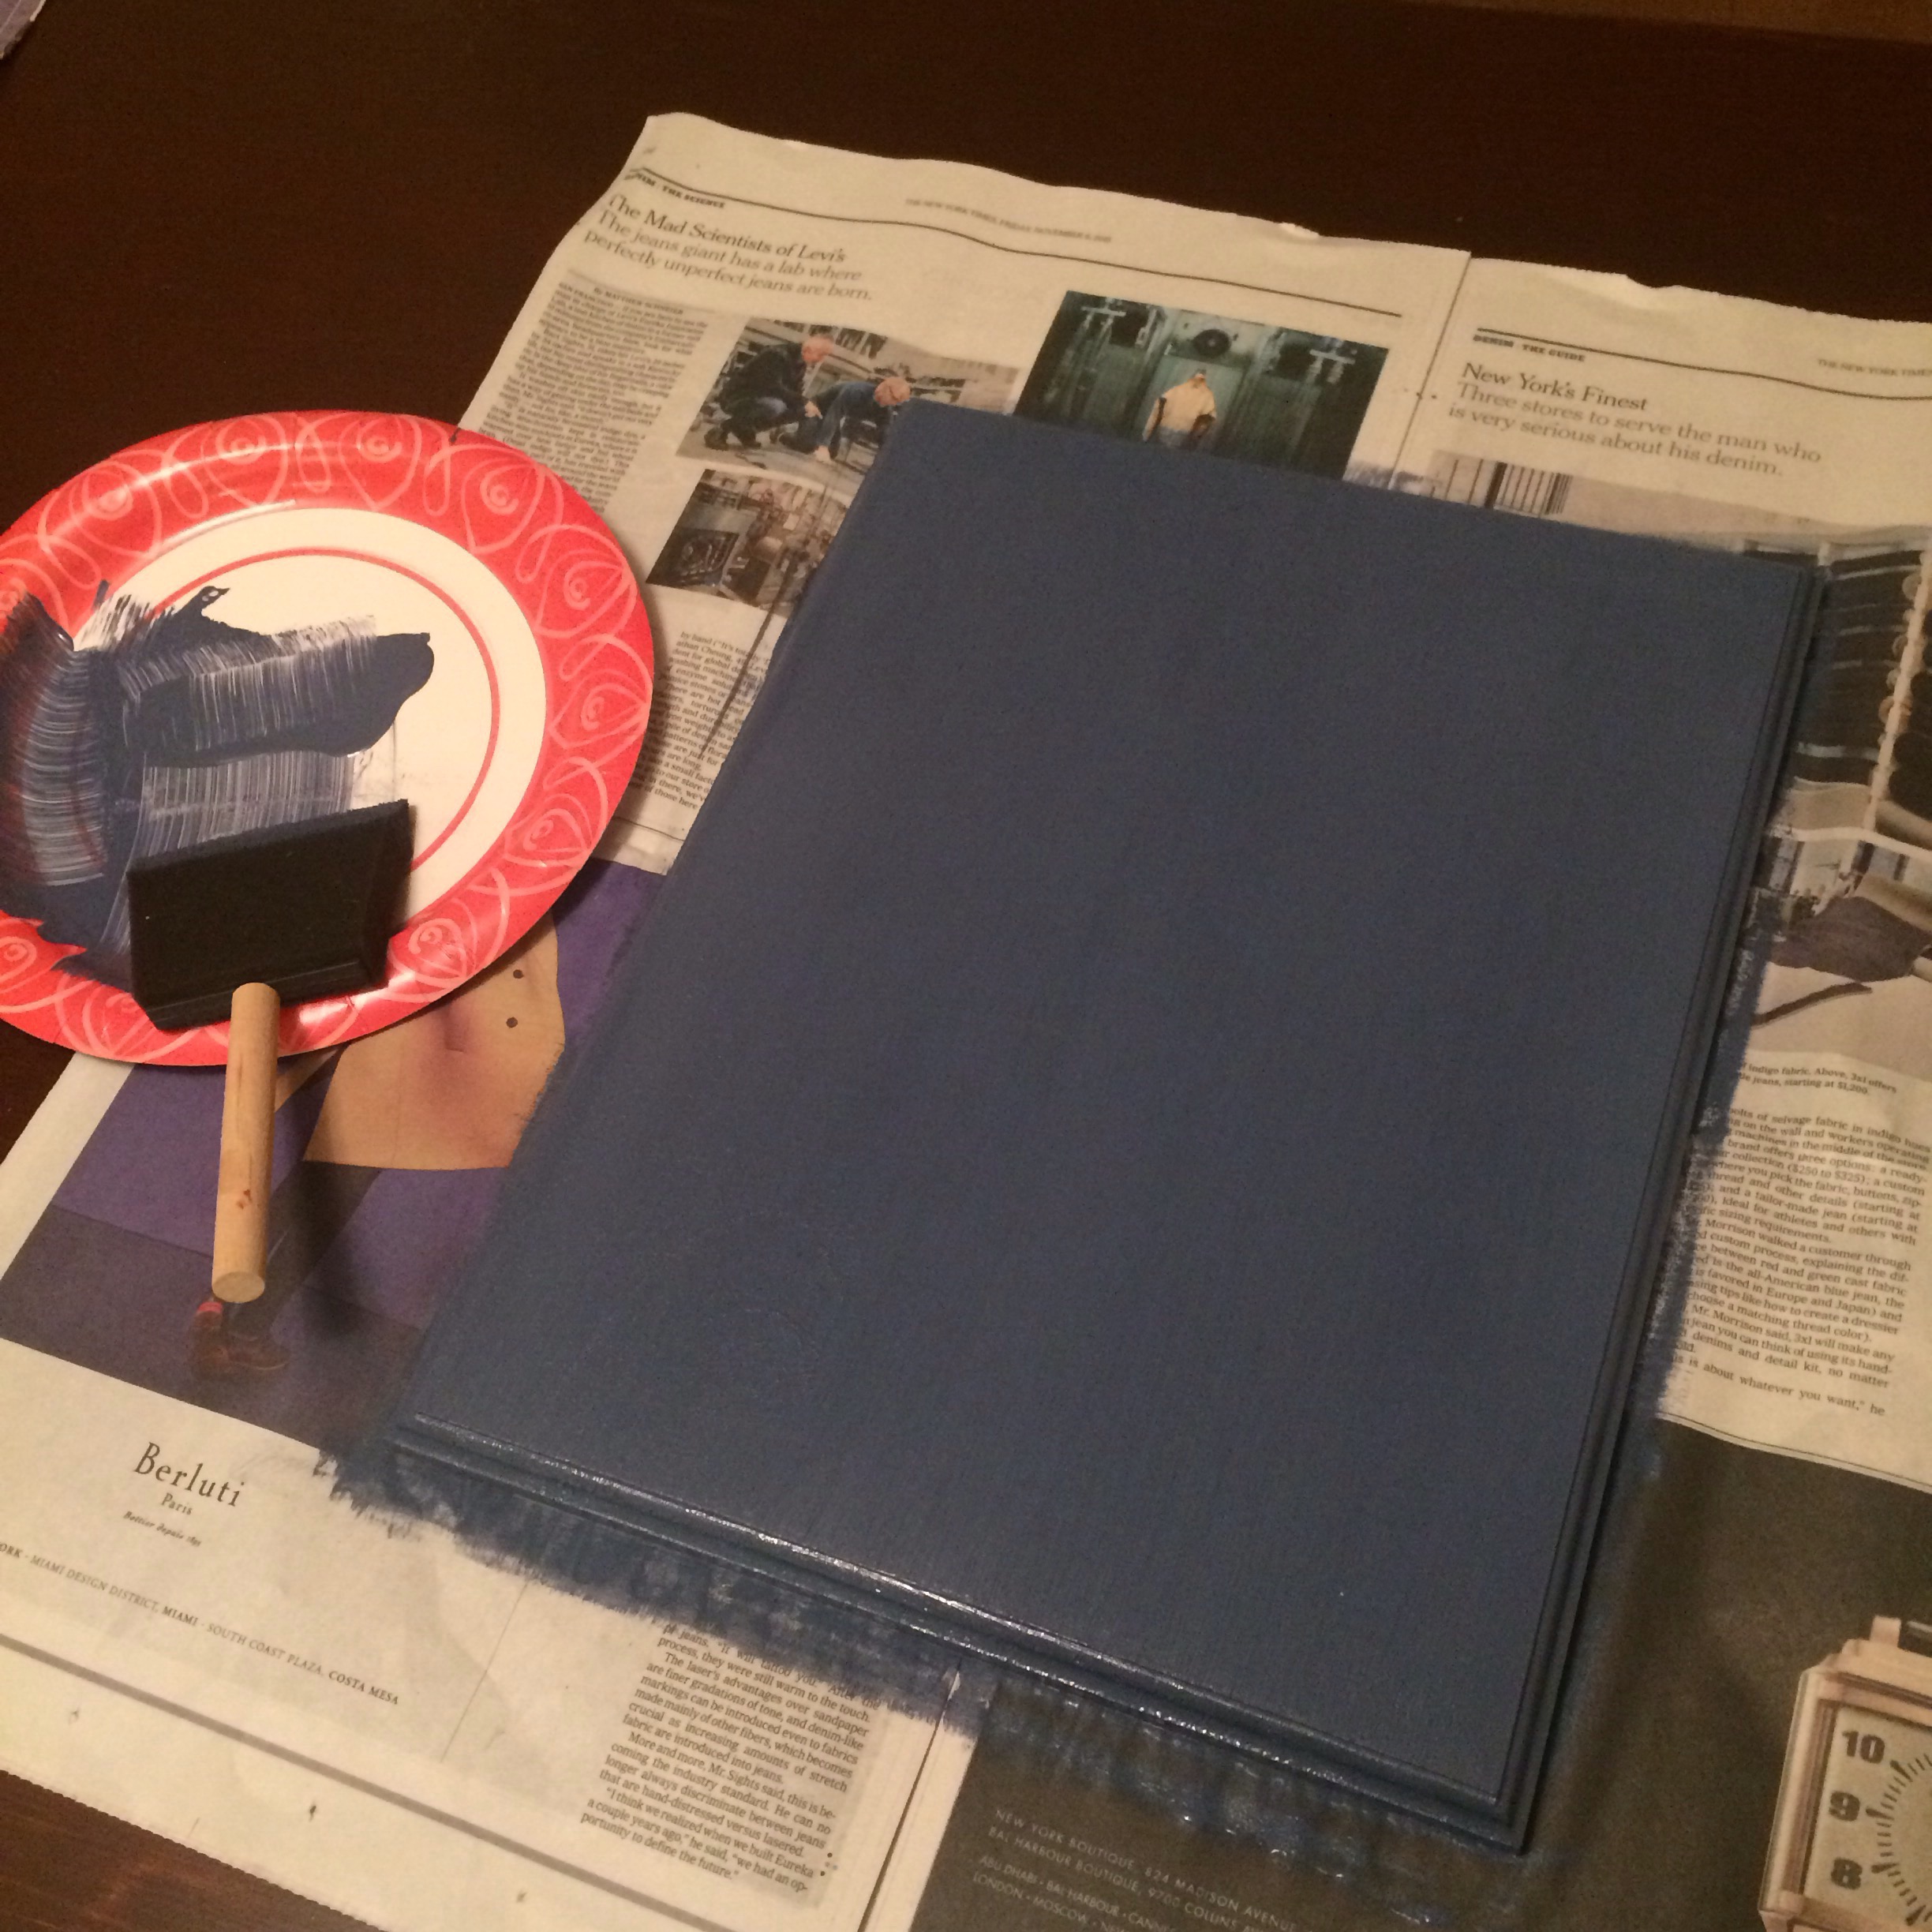
- Paint wood board – allow to dry completely – I used two coats of paint. Once the paint has dried completely tape the outline of the state in the desired place.
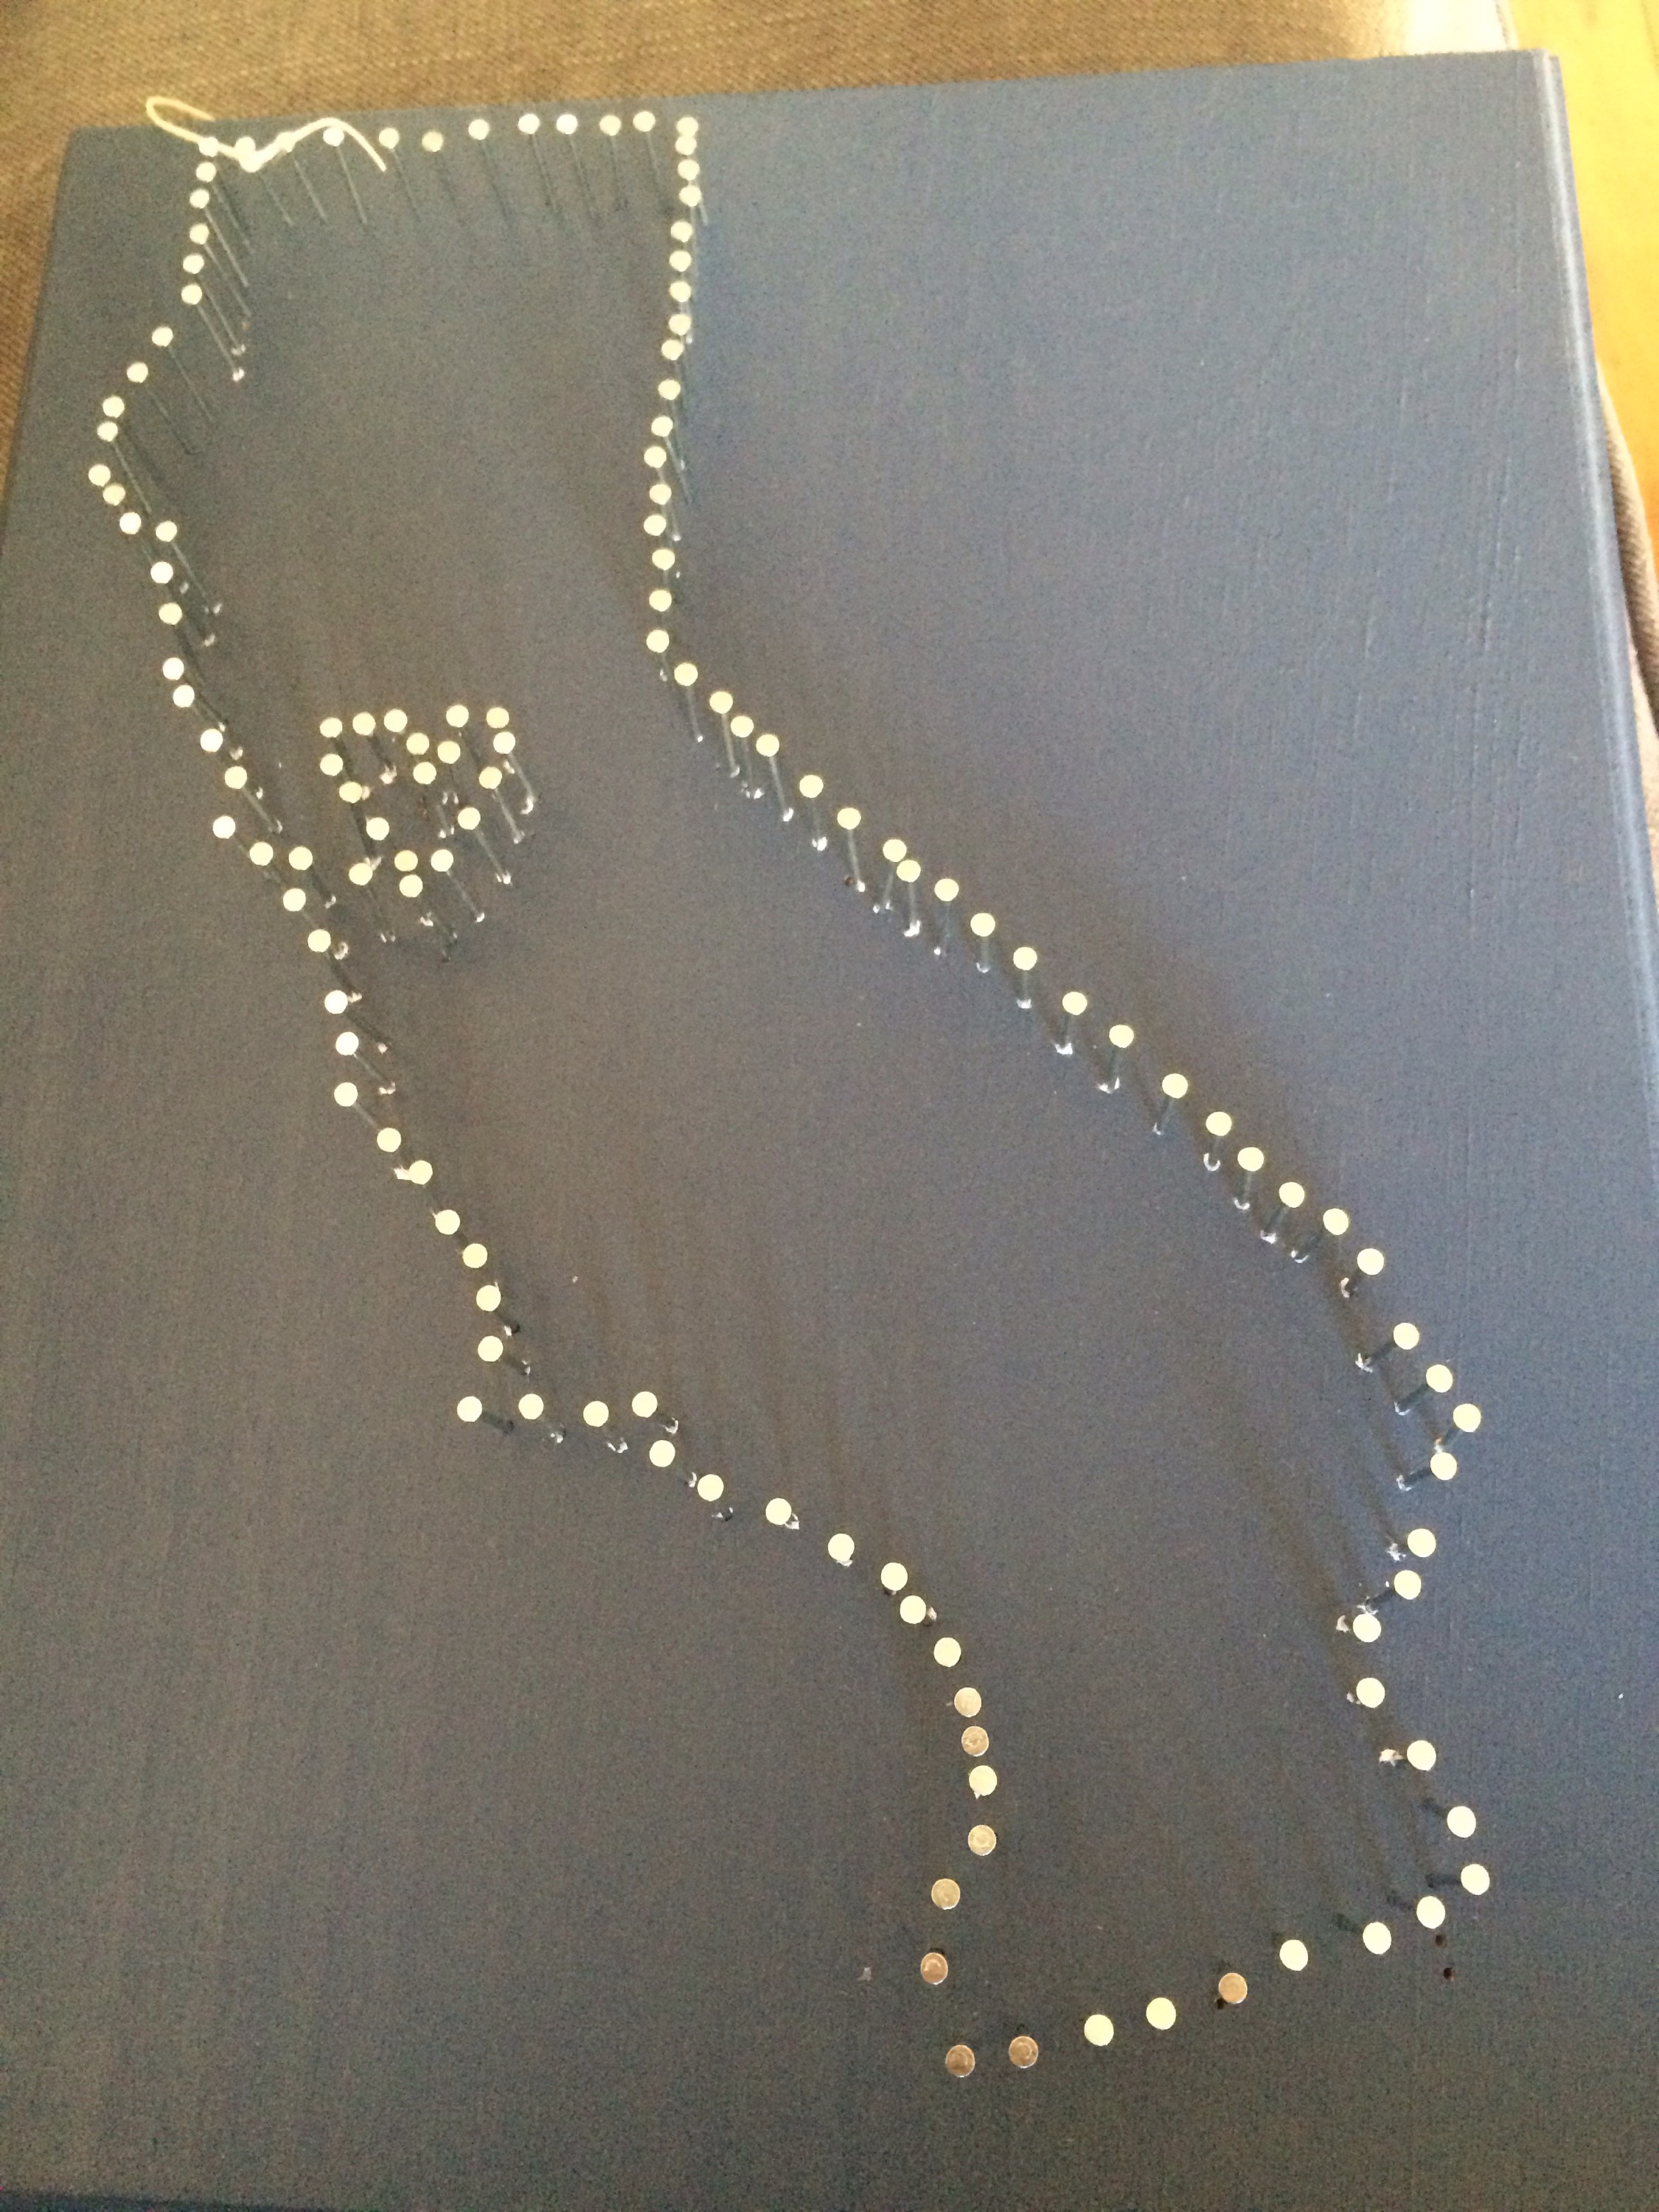 2. Begin hammering nails following your outline – I found it easier to start with a nail at each corner and then adding nails spaced apart, rather than trying to hammer them all close together in the beginning. Also I recommend hammering the heart in first otherwise it’ll be much more difficult & awkward if the state is already outlined to try and squeeze the heart in.
 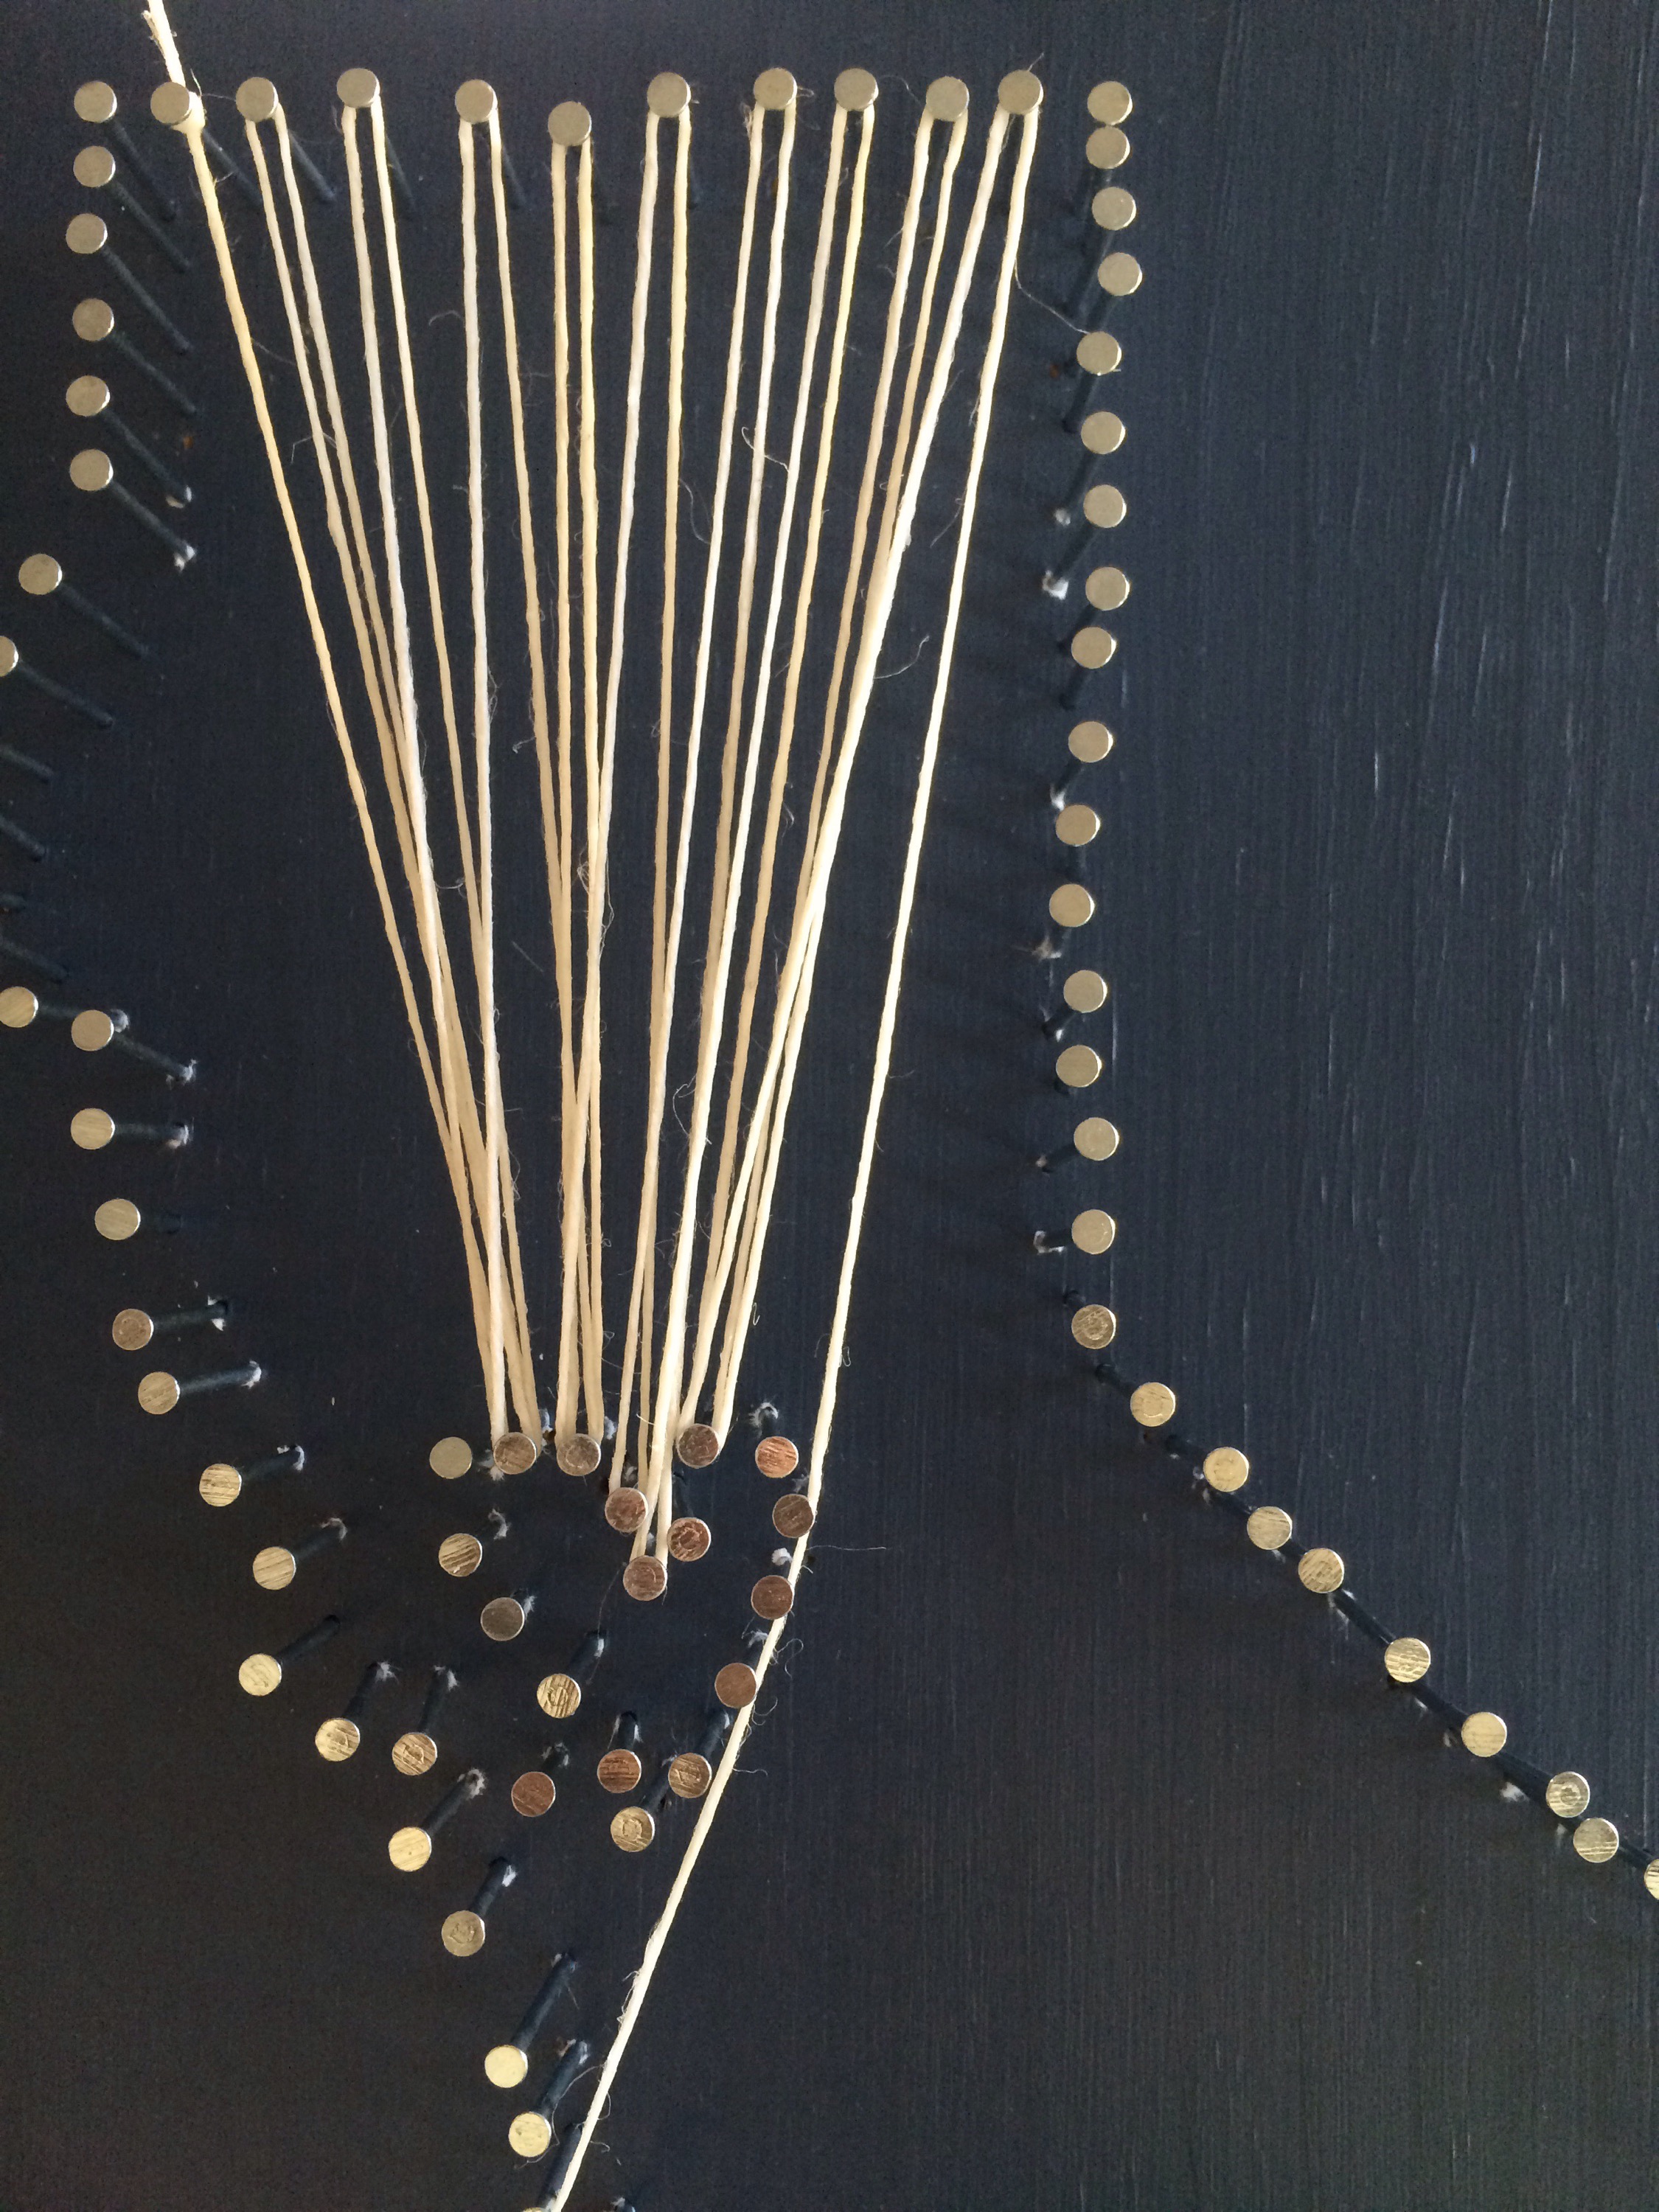 3. Take the string and start at a corner, make a small knot to secure the string to an outer nail, and begin looping the string around the nails of the heart. I found out the Texas state outline was somewhat easier than california just based on the shape of the state. It may take a few tries to figure out the best number of times to wrap the string around the inner nails. *Note – not all the nails will have string wrapped around – in the picture below you can see how some of the nails on the curve inward on the southern end have been skipped.
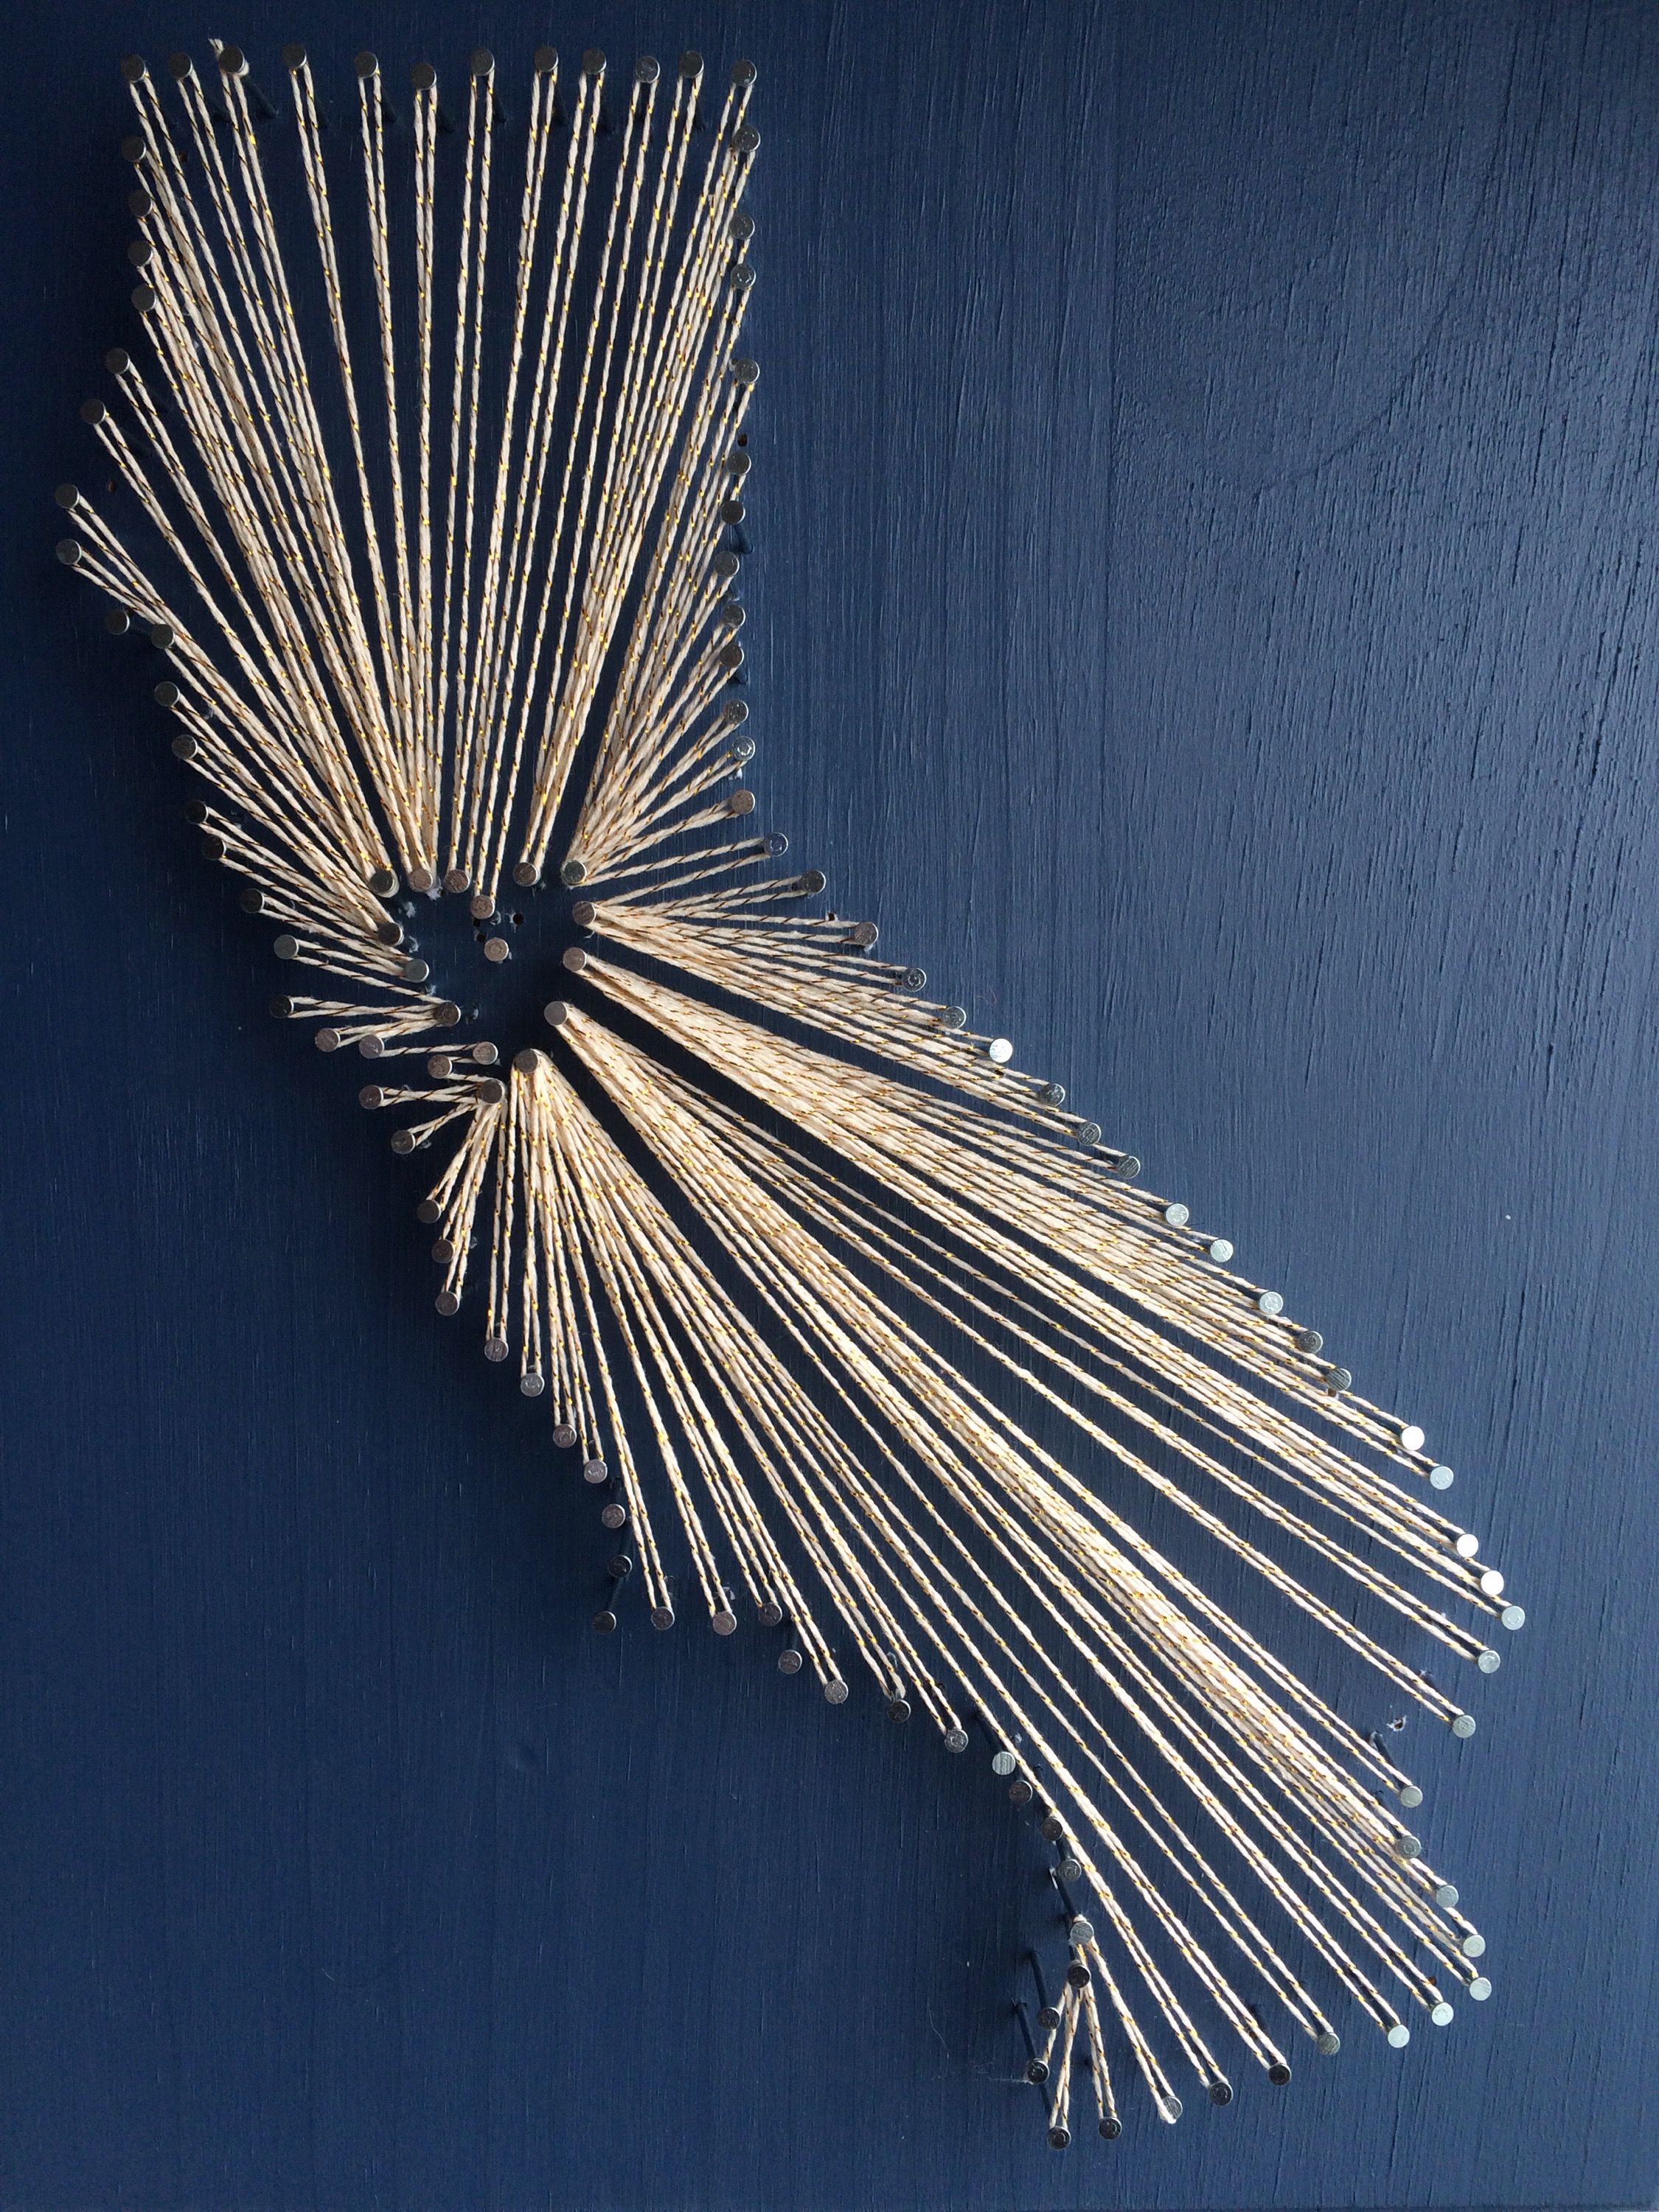
4. Once you have completed the final loop make another small knot to secure the string, and you’re done & ready to display!
This project will run you about $20 -$25 and makes a perfect gift! Have you made your own string art? if so I’d love to hear about it!