5 Fool Proof Cake Tips – From one mom to the next!

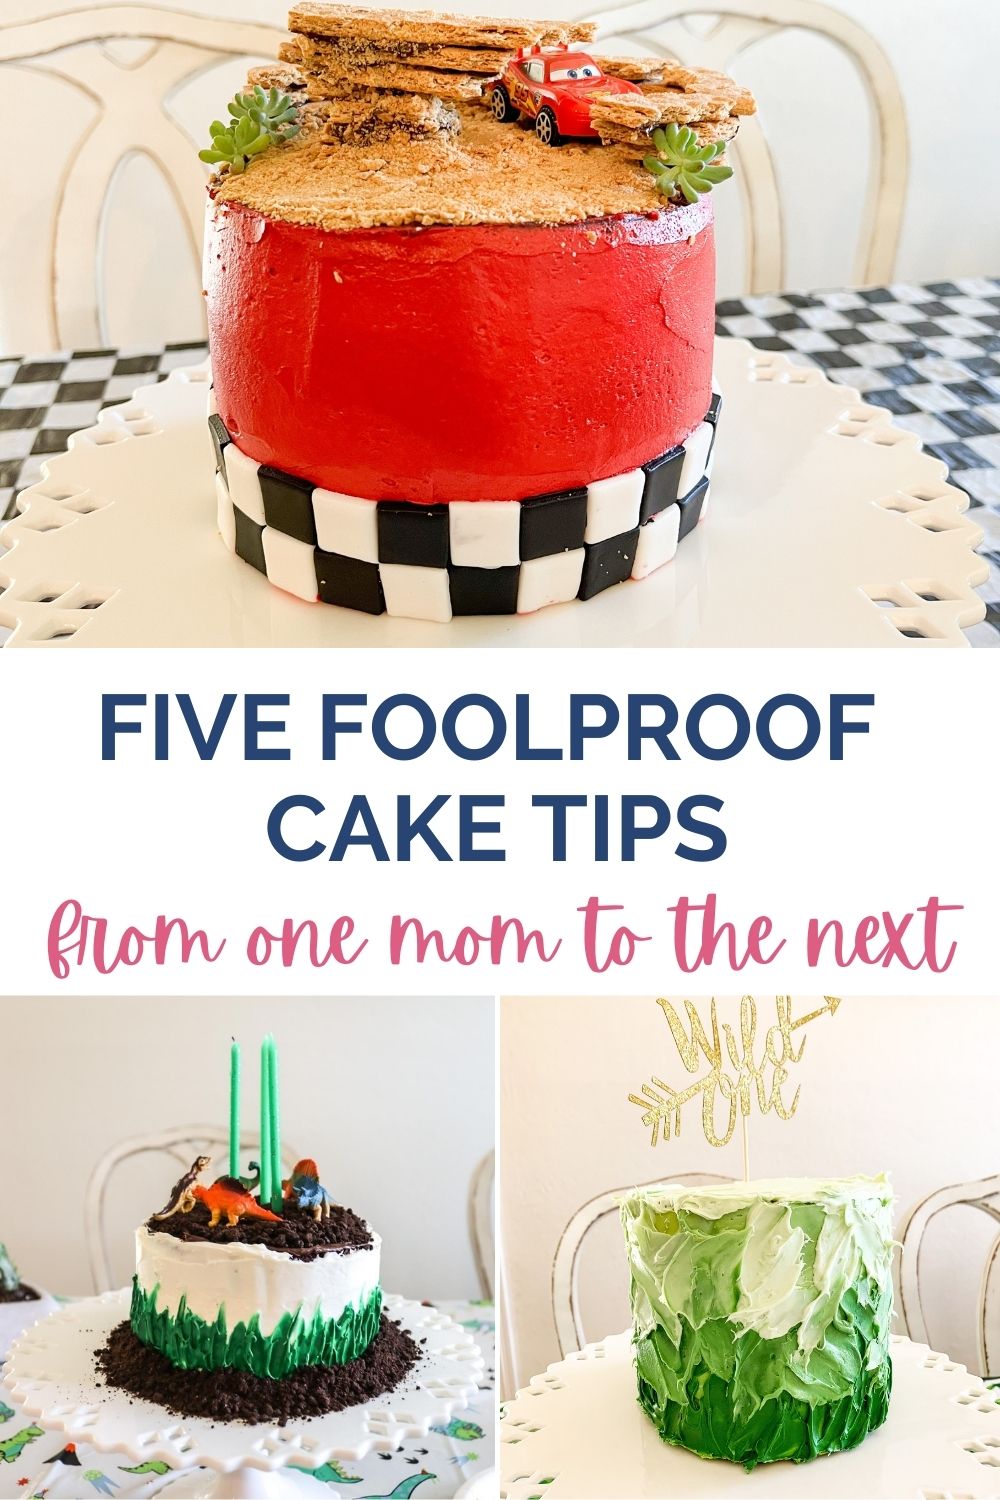
Since becoming a mom I have loved making the boys their own special birthday cakes and enjoy decorating them. I’m by no means a professional or have any kind of training – but I have learned a few things along the way as the evolution of photos at the end of this post shows! I thought I would share some of the simple tips that have made a big difference in my cake game, from amateur mom baker to another.

Make it easy on yourself – I don’t make the entire cake from scratch… I’m all about jazzing up a box cake mix (using milk instead of water, butter instead of oil). If you want to try to do a fun decoration don’t feel like you have to DO IT ALL. Make things easier where you can!

Invest in a cake kit. The first few years I didn’t spend the $17 for a cake kit and I kinda wish I had. A turntable, a scraper and a couple decent spatulas can really make a big difference. This is the one I bought this year. They sell ones with dozens of more pieces but I opted for something simple.

Freeze your rounds – this was a tip I discovered last year. Freezing or chilling your cake rounds makes frosting SO much easier!! There’s none of that crumbling you normally experience and it doesn’t take away from the taste or texture. Just make sure to wrap them in plastic wrap tightly if you plan on chilling or freezing for longer than 30 min.

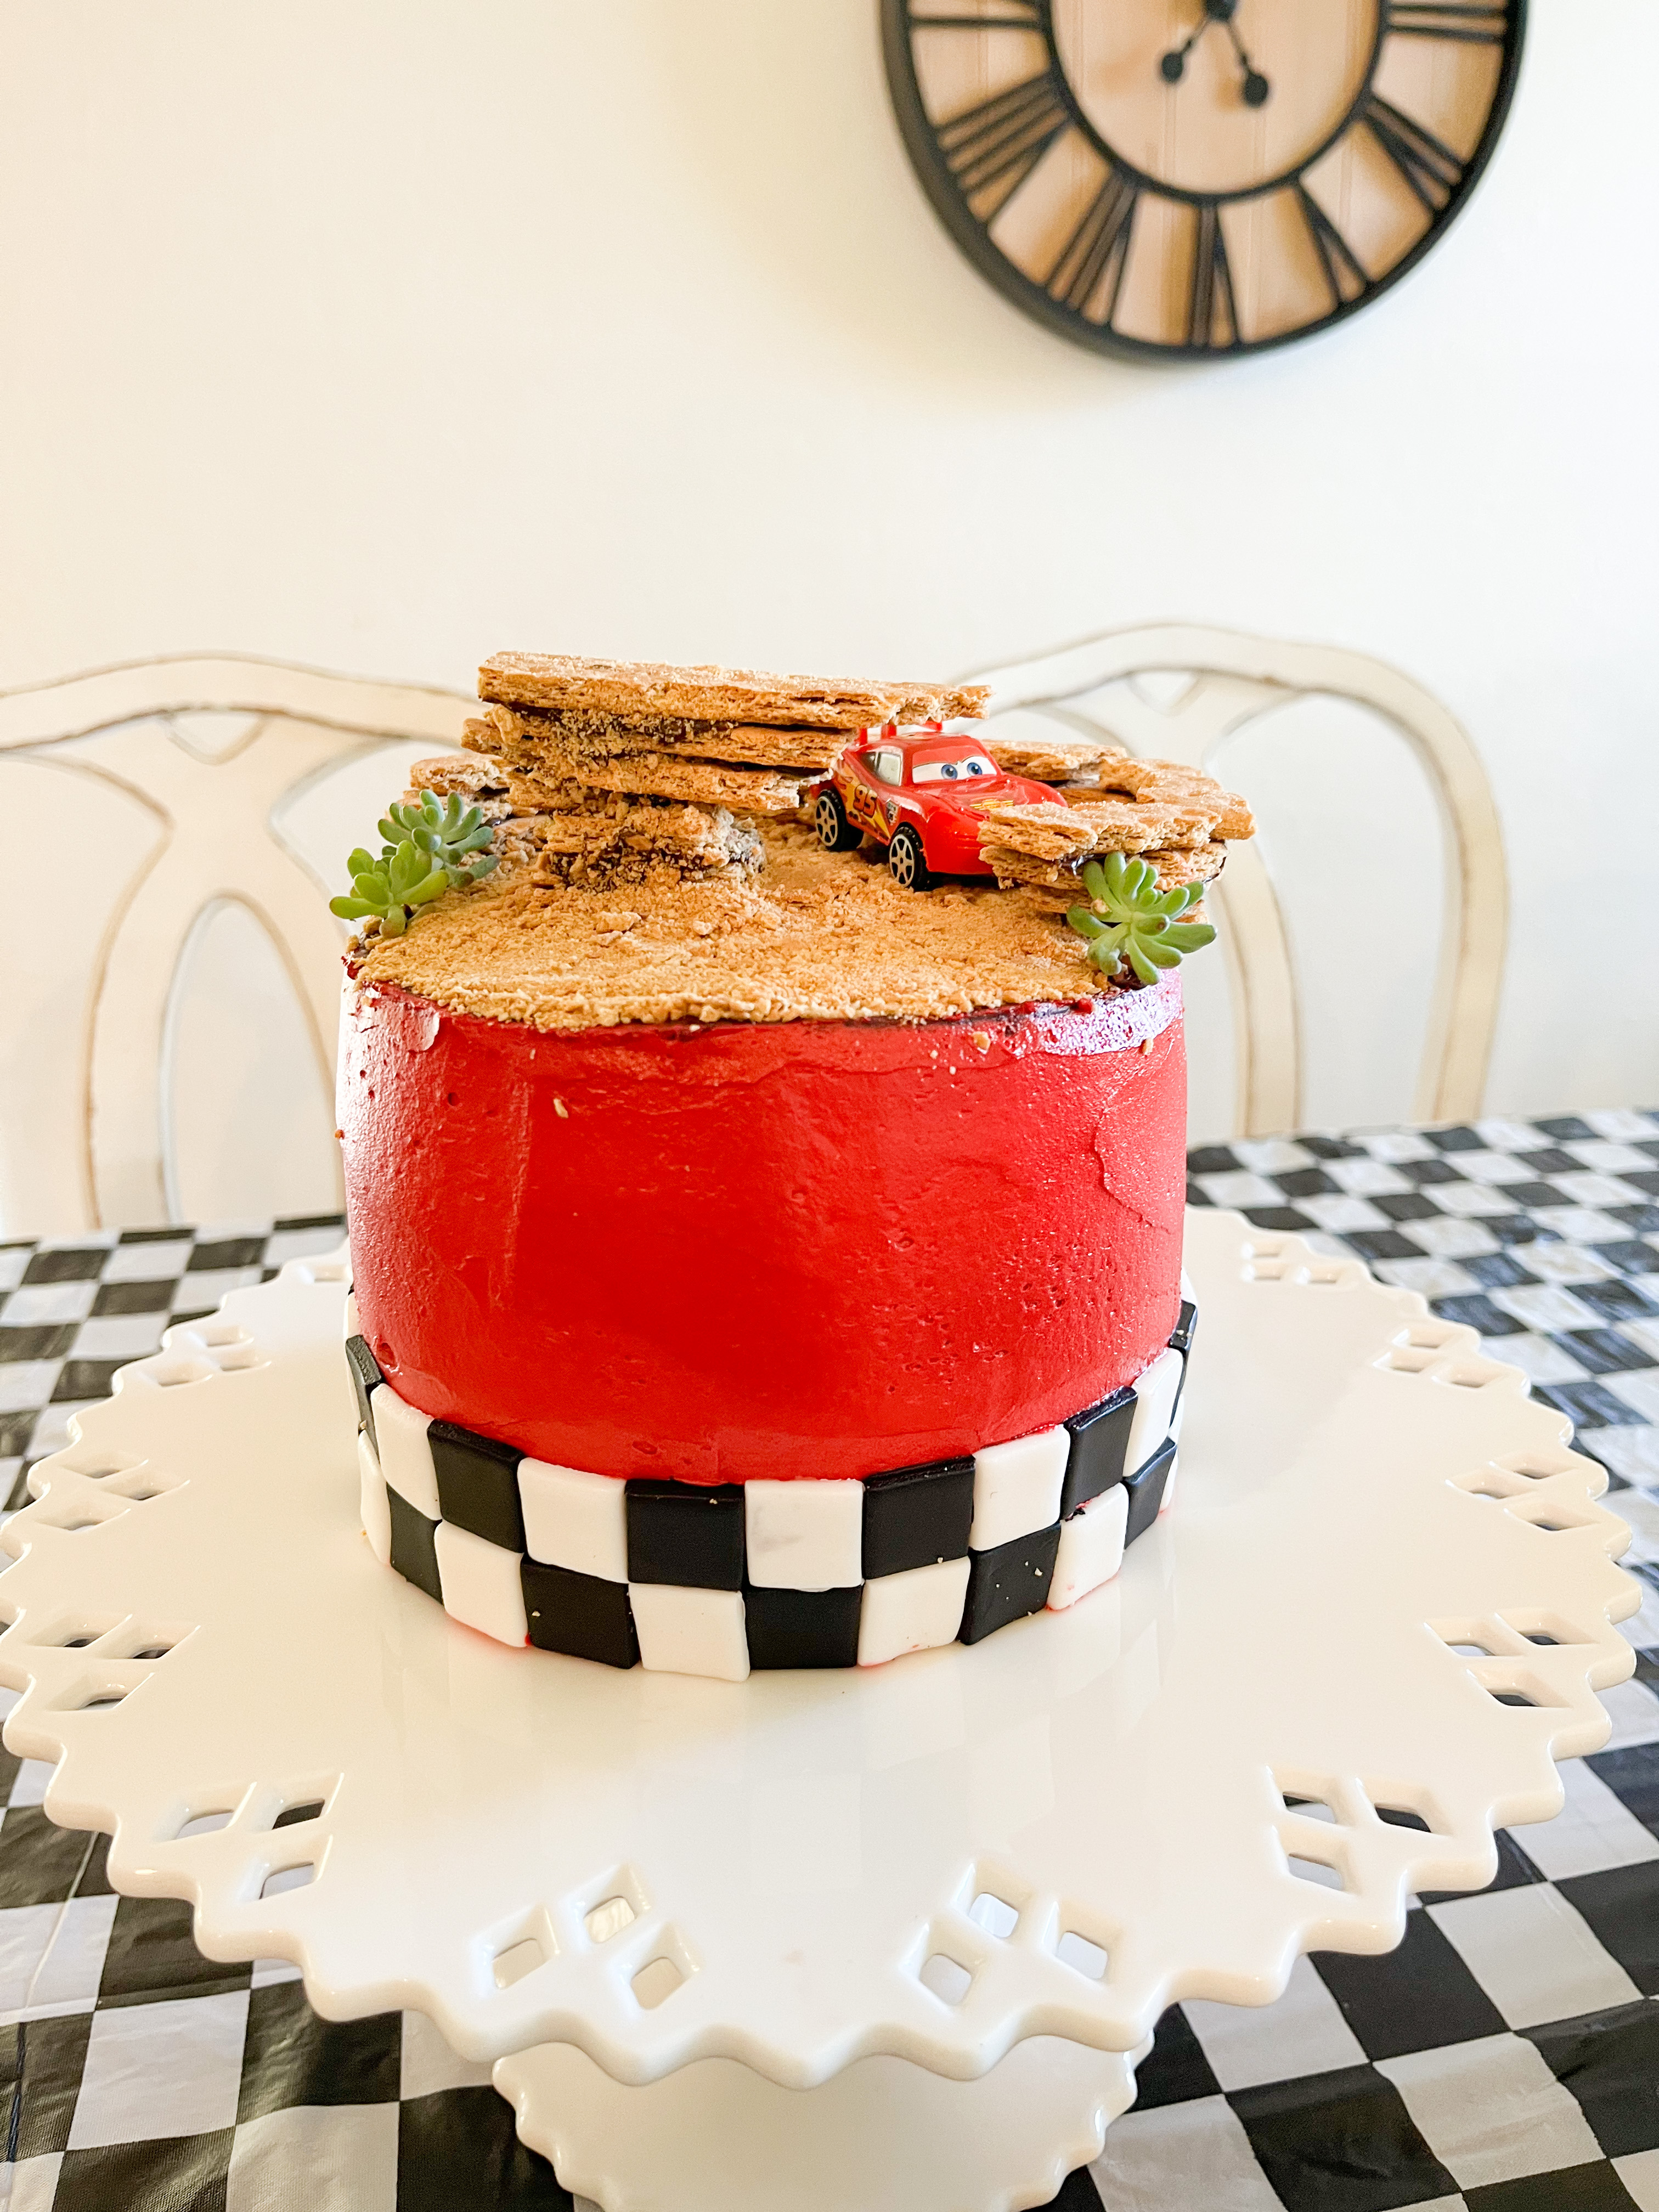
Start small and pick a design or style that you’re excited about – I get most of my ideas off pinterest & I try to pick cakes that feel doable. Over the years I have slowly expanded what I felt like was “doable” 3 years ago I would have never even tried this Cars cake. The idea of doing a fondant checkerboard bottom alone would have been too much. Even this year, I was fully prepared to scrap that detail if it wasn’t working out!

Stop by your local bakery! – did you know most grocery stores will sell you their cake frosting?? This year I went to Safeway and bought a bunch of white frosting directly from the bakery & then dyed it red! I’ll definitely be doing this going forward. Again, make things easier where you can! Maybe someday I’ll have time to perfect my own cake frosting but for now this is a short cut I’ll be taking!

BONUS: Have fun with it! Even if your cake flops it won’t be the end of the world. I have store-bought cupcakes as a back up & I focus on the fun aspect! Also don’t underestimate the power of crumbled graham cracker or Oreo cookie as a way to add texture and make the cake look more detailed!

Cars cake for Will’s 4th Birthday (2022)
Dino Cake for Will’s 3rd birthday (2021)
2021 “Wild One” for J’s 1st Birthday

“Two the Moon” Will’s 2nd Birthday (2020)
Smash cake for Will’s 1st Birthday… to show we all start somewhere!

Johnathan Wade’s Newborn Photos & Tips for Taking Your Own!

Yesterday my bestfriend came over & we shot Johnathan’s newborn photos. We did this when William was a newborn too. Newborn photography can be costly & intimidating but they don’t have to be! These photos took about an hour all in all to shoot. Ideally you want to take photos in the first week or two when babies are the squishiest & easiest to pose & they tend to stay asleep through different positions. Below I’ll share tips for taking your own photos & the set up we used.

The Set Up

  • Boppy Pillow
  • Heating Pad – Be VERY careful with a heating pad. I placed it under a thick plush blanket & set it on the lowest setting, checking frequently to make sure it wasn’t too hot, I ended up turning it off completely.
  • Plush Blanket – something with texture is nice
  • Somewhere near a window with lots of light!

I put the heating pad over the boppy pillow, followed by the plush blanket I wanted to use. This blanket is extra special because my late aunt sent it to us shortly before she lost her battle to cancer one day after our son was born.

I positioned the boppy / blanket set up on our bed near a window that got plenty of afternoon light. But when I took William’s newborn photos the set up was on his rocking chair, near a window. The key is finding an area of your home that gets good natural light.

The heating pad helps keep baby nice & cozy & asleep. I use it when I’m taking photos when baby isn’t wearing anything but a diaper. As I mentioned previously, exercise extreme caution when use the heating pad, don’t use it above the first setting and check frequently the temperature!

Next up: Angles! I go by one simple rule: if you can see up the baby’s nostrils it’s not the best angle. You want to shoot the opposite way. Granted you’ll notice not all of the photos live by that rule but it’s a good thing to keep in mind while you’re taking photos.

Editing: Most photo editing apps have a lot of free features you can adjust. For newborn photos I usually follow these basic steps: Straighten the photo, increase exposure, decrease shadows, decrease texture & clarity. I use light room to edit all my photos so I’m also able to fiddle if I want to decrease any hues of certain colors. You’d be amazed at how much better a photo can look just by simply straightening it & adjusting the exposure.

If you’re on a budget, don’t want strangers in your home taking photos during a pandemic or are like me and can’t stomach paying hundreds of dollars for photos you can take yourself try out these tips!

Flying February 

February always seems to go by in the blink of an eye & this February was no exception. We layed low much of this month, in part due to my hectic work schedule. We enjoyed staying in the bay area, took a quick trip to Napa & introduced Juno, our black lab, to wine country. Needless to say she loved it. For Valentine’s day I made these festive chocolate dipped strawberries & we enjoyed a delicious dinner at the Cliff House! The cliff house is a San Francisco must, the food did not disappoint whatsoever. These chocolate dipped strawberries are super easy to make. 1/2 a regular pack of chocolate chips will cover a regular size pack strawberries. I melted the chocolate chips in a glass bowl with a 1/4 tbsp of coconut oil. Microwave in 30 second intervals, stirring in between, until completely melted. You can dip the strawberries or drizzle the chocolate. I added Valentine sprinkles for additional  cuteness. Then I refrigerated them until consumption! I’ve been making these strawberries as a sweet Monday night bachelor themed dessert! Let me know if you recreate these. We’re off to Scottsdale for Giants spring training today! 
Xoxo

DIY Scented Candles


Whether you’re making them as gifts or you’re like me & can’t bring yourself to buy a $30 candle from Anthropologie, this tutorial will show you candles are a super easy project to take on!

What you’ll need:

Optional items:

  • Paper to line countertops for easier clean up
  • Crock pot liners – easier clean up


I’ve been making candles for about 3-4 years now. Usually around the holidays I invite some girls over & we have a little holiday crafting day & everyone makes some candles either for themselves or to give as gifts over the holiday season! Over the years I’ve come up with some tips / tricks  for easier candle making & easier clean up!

Probably my biggest tip is to line your counter-tops with paper. I usually get some plain paper in the dollar aisle at target or you could even use heavy duty tinfoil. Just something to keep the counter-tops protected from any wax spills.

Along the same line of lining your counters I recommend buying crock pot liners. Unless you plan to dedicate a specific crock pot to candle making. I usually line the bottom of the crock pot with tin foil & then use the liner. It makes clean up so simple. I just allow the crock pot to cool completely and then lift the liner out & toss away. Then I just need to run some soapy water over the crock pot & it’s good to go.

I get all my supplies from amazon. But I know they sell candle wax / candle scents at craft stores like Micheals, so if you finder cheaper deals than what I’ve linked to, go for it!

The first step is to line your counter-tops for easy clean up.


Next, pour the soy wax into the preferably lined crock pot and allow the wax to melt completely. I find it usually takes about 40 minutes to melt about 5 pounds of wax on high. I usually just start that process while I’m getting the rest of my supplies in order.


Once the wax has completely melted you can begin filling your containers. I try to do all the containers that will have the same scent at once. When it comes to adding the essential oils, go big! Especially if you’re trying to get a candle to be as fragrant as store bought. I think I’ve only made one candle that was wayyyy to scented & honestly I think it had more to do with the actual scent than with the amount I added. once you’ve added the desired amount of essential oil, place your wick.


I’ve experimented briefly with wood wicks and have been disappointed with how quickly they burn out. So if anyone has a good suggestion for a brand of wood wicks please tell me! Otherwise I’ve gone back to use the standard candle wick. I use medical tape across the container to support the wick as the wax melts. It’s important to cut the wick to approximately the height you’ll want it before trying to put the wick in the hot wax. I find the wicks try to collapse or fall over if you don’t cut them ahead of time.


Finally allow the candles plenty of time to harden completely & then that’s it! All in all it usually takes the candles about 60 minutes or so to be done. It depends on the size of the candles you’re making though. I usually make a variety of sizes, scents & styles.


If you use this guide, I’d love to see or hear about any recreations in the comment section below!

Happy Holidays to all!

Terrarium Build – DIY


Walk into a boutique or nursery in San Francisco & you’ll see terrariums like these priced upwards of $75-$100 (!!!!). However for about $40 & 30 minutes you can build your own. A few weeks ago I built these two, one I gave to my friend for her birthday & the small one I couldn’t resist keeping for myself.  I found these awesome geo terrarium containers at World Market. The containers were the priciest part of this DIY, so if you’re on a budget you can find cheaper options here & here . With the holidays just around the corner this is the perfect DIY gift for anyone on your list!

The items you’ll need:

Steps:

  1. Pour approx 1/2 – 1″ of sand in bottom of container.
  2. Layer large rocks on top of sand.
  3. Next add thin layer of activated charcoal, this helps prevent unwanted smells while watering.
  4. Add approx 1-2″ of soil
  5. Add succulents & air plant(s)
  6. Finally add moss & decorative rocks.

Care: Keep terrarium in indirect sunlight & mist once to twice a week.

Comment below if you build your own!

Labor Day Love

img_7657^Juno can’t believe all these gorgeous lakes & waterfalls are in the city!
img_7675^^ How gorgeous  was this Labor Day Sunset?!
^^ True love is when your husband drafts your fantasy football team while you do your makeup. 
Labor Day kind of snuck up on us this year. We didn’t plan any getaways & it honestly turned out to be a great weekend in the city. Friday, Juno (our black lab) & I did an urban hike through Golden Gate Park. We walked about 6 miles in the park & it was awesome. We stumbled upon the amazing waterfall above Stow Lake. I had been to the waterfall before but somehow missed the part where you’re able to walk to the top!! Juno seriously was in heaven. Friday night we reunited with one of near & dear friends & just went out to a delicious dinner & enjoyed being out in SF. Saturday was a true test of our relationship, we had to go to Ikea – hung over, on both a holiday weekend & a college move in weekend!!! Luckily we survived & successfully built our furniture haha. We rounded out the weekend with a little bbq & I made some of deviled eggs & a watermelon caprese salad! Holidays are just the best excuse to make delicious treats! Happy unofficial end of summer all!

Tuesday Thai

IMG_2700

Curry is a meal that can seem daunting to make, but I assure you it’s actually much easier than you think! I started cooking curry about 5 years ago, my best friend & I were poor college kids & couldn’t afford to order in delicious Thai as much as we’d like, so we decided to combine our culinary skills & make our own curry. Since then, curry has become a staple meal in our house. I love making curry because there can be a ton of variations, you can change up the protein or veggies for a different taste. In the autumn & winter months I love making curry with pumpkin or squash.

One of the reasons curry makes it on our menu so frequently is beacuse it’s a relatively quick meal that usually is filled with veggies & protein & typically renders lots of leftovers! So this is often one of the “big batches” I make early in the week.

IMG_6484
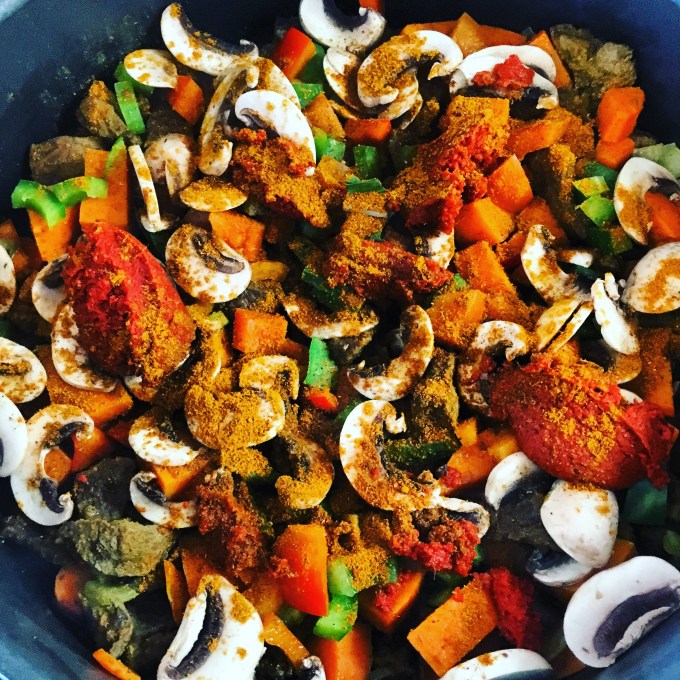
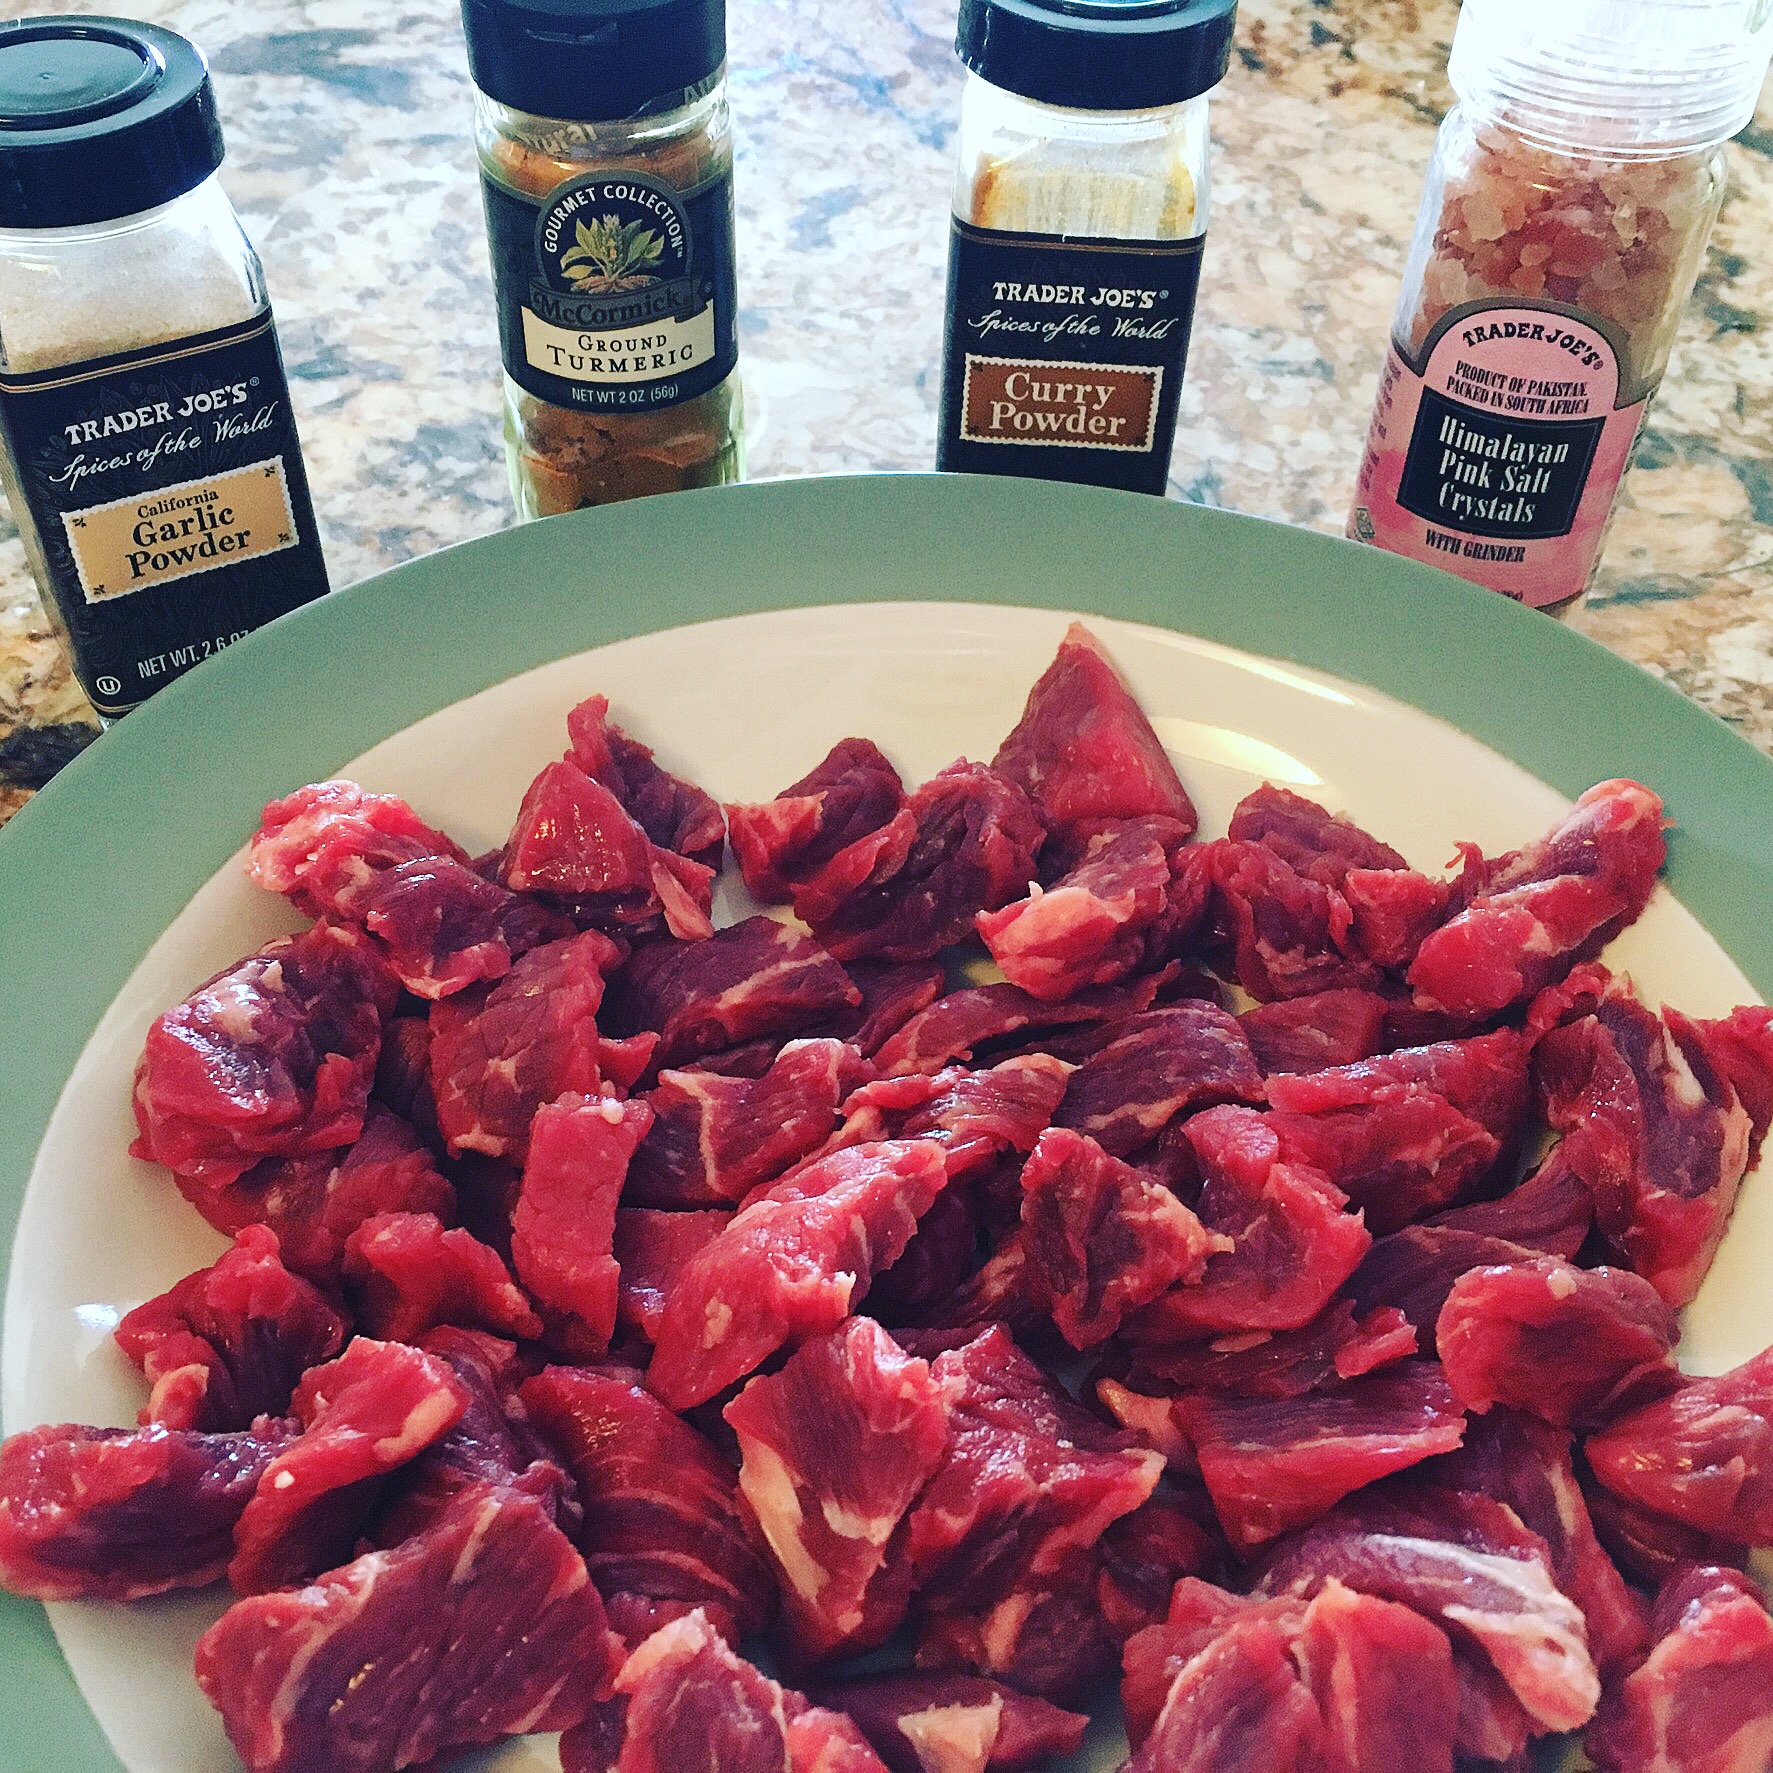
The first step is to cut the protein into small bite size pieces & season with: salt, pepper, garlic powder, curry powder  & turmeric. Once seasoned I place in the fridge while the rest of the prep work is done.IMG_4788.JPG
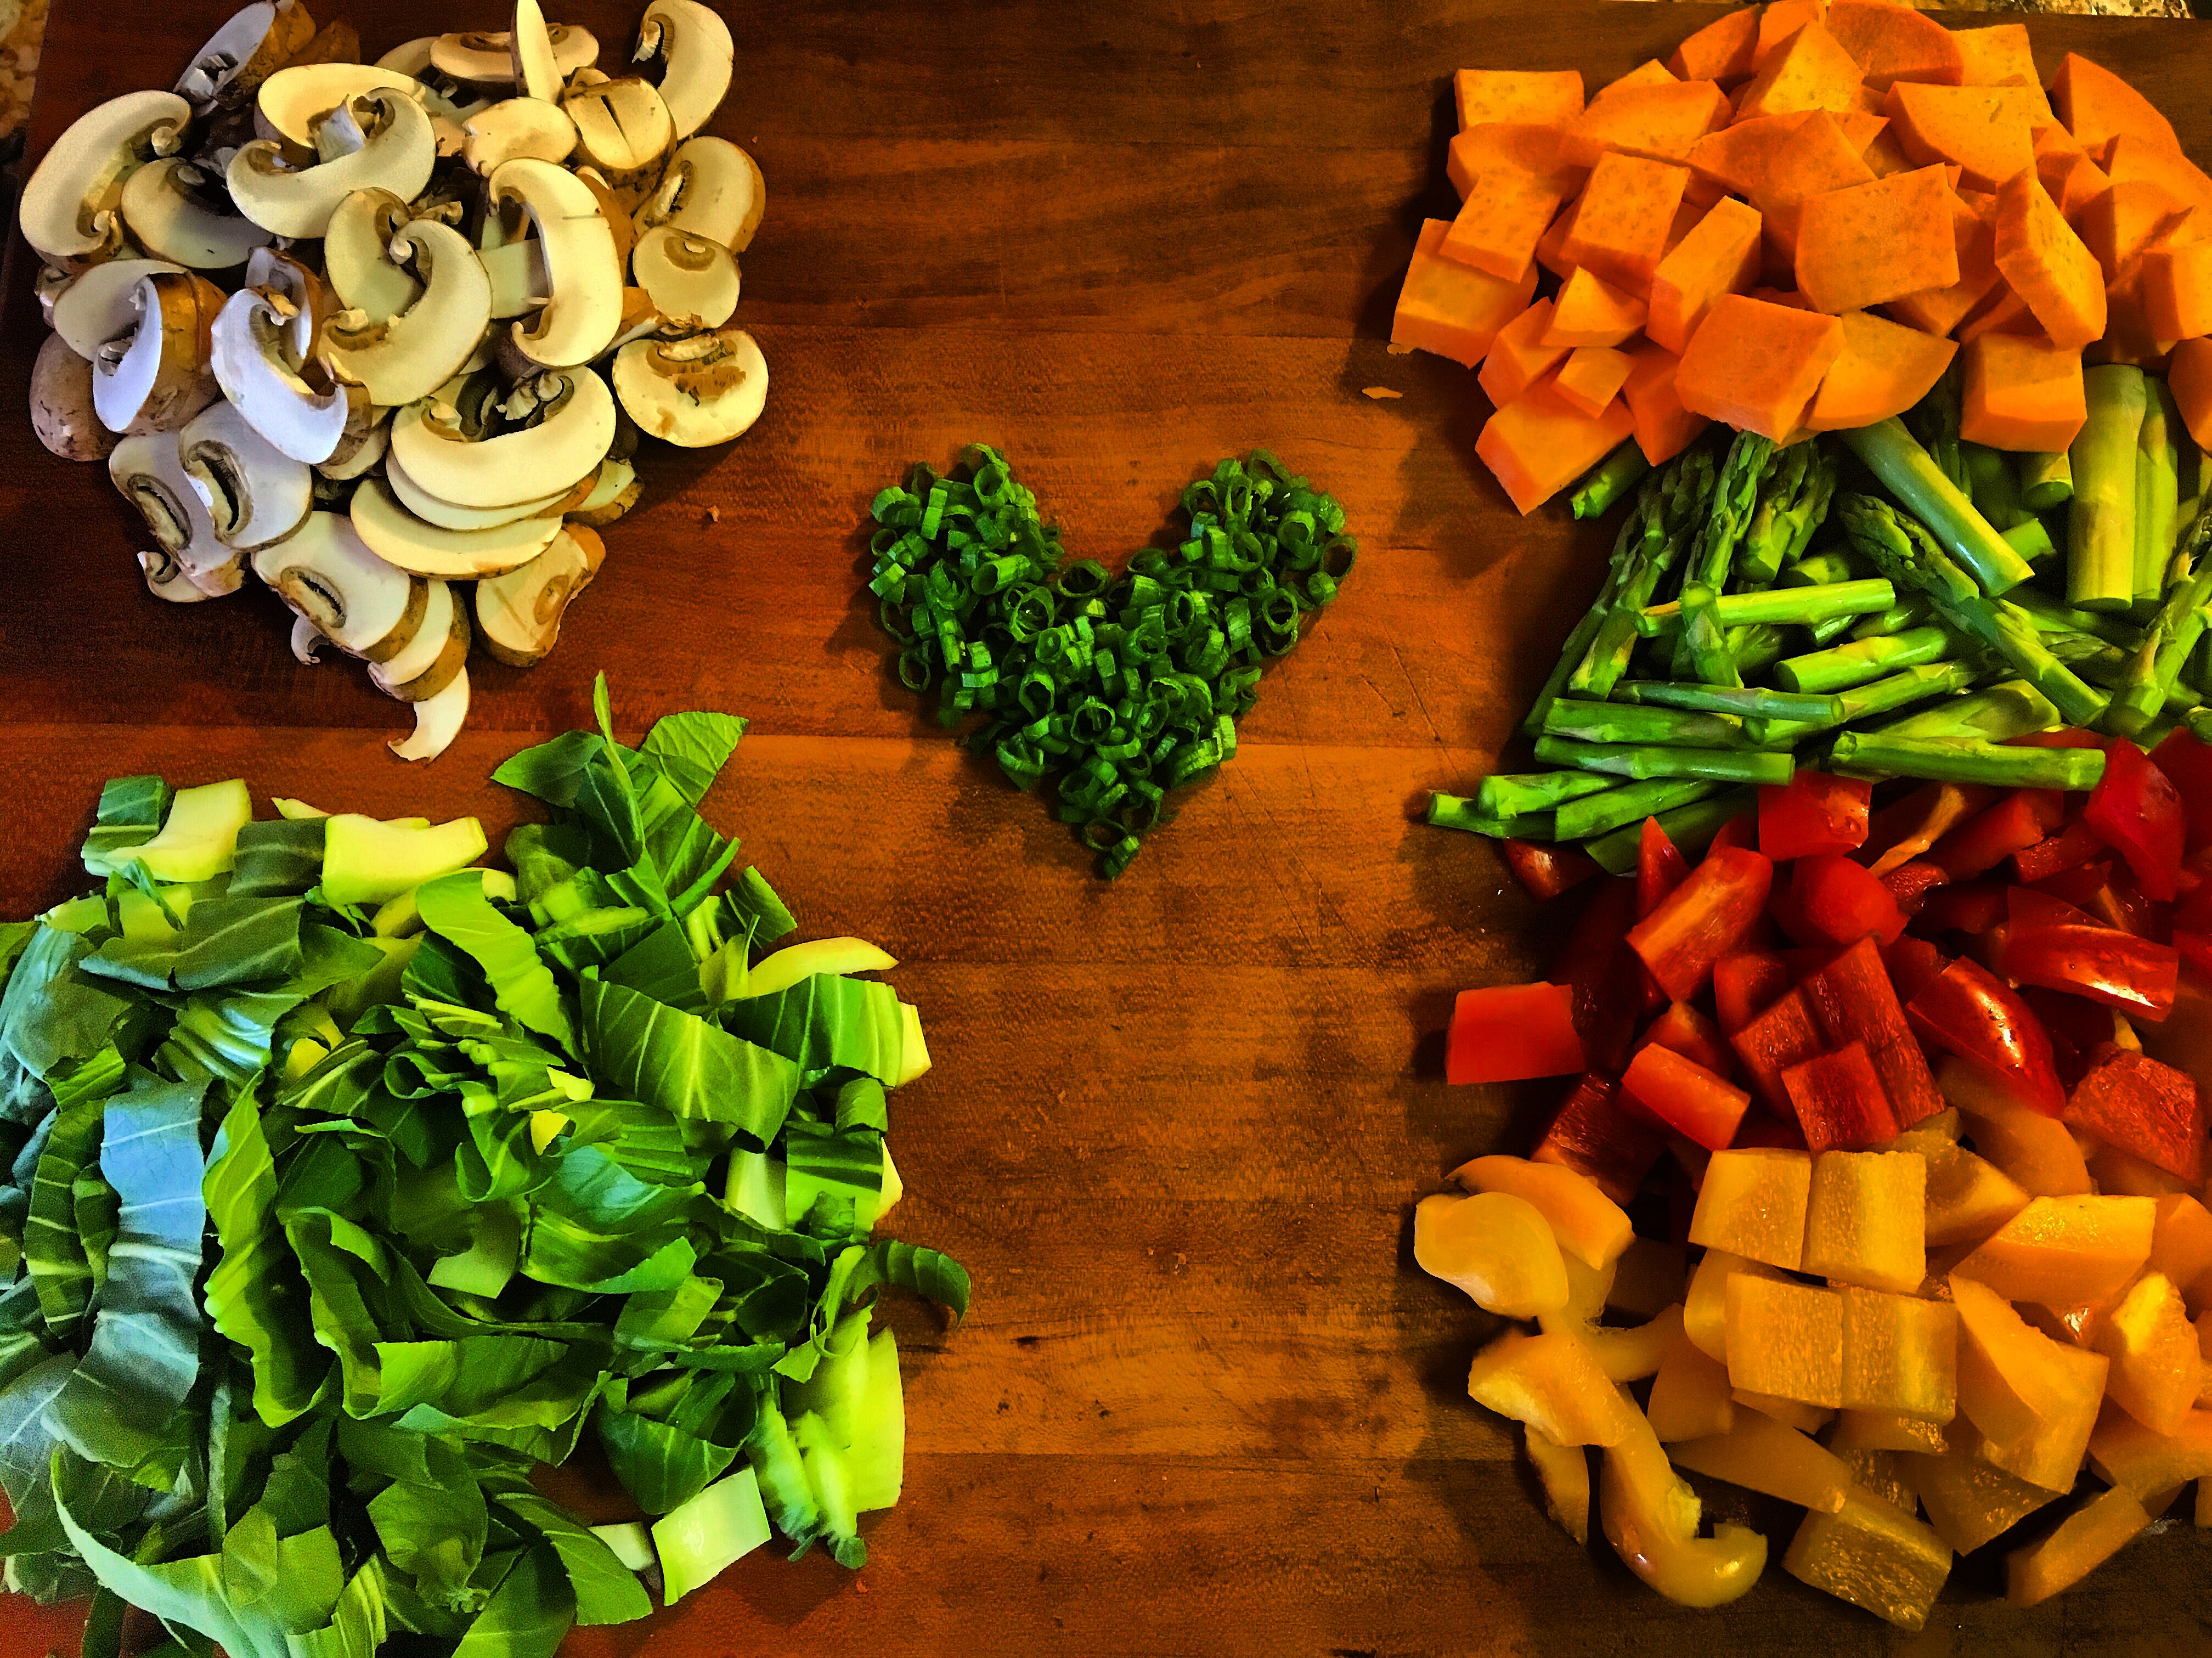
The next step is to prep all the vegetables. I usually use mushrooms, sweet potatoes, bok-choy, bell peppers.  I typically just use whatever’s in the veggie drawer. I truly believe that eating healthy involves eating colorfully so I’m all for any meal that incorporates a ton of veggies.IMG_6486Once all the veggies have been prepped, heat 2 tsp of olive oil in large saucepan or skillet over medium heat. Add in onions, garlic & seasoned meat. You want to saute the meat until it starts to brown, (timing will vary depending on protein type).IMG_6487Next, add in the chopped sweet potatoes and allow to cook for 3-5 minutes, covered. The sweet potatoes & rest of the veggies will continue to cook once the coconut milk is added so don’t worry if you think the veggies are too underdone.IMG_6488
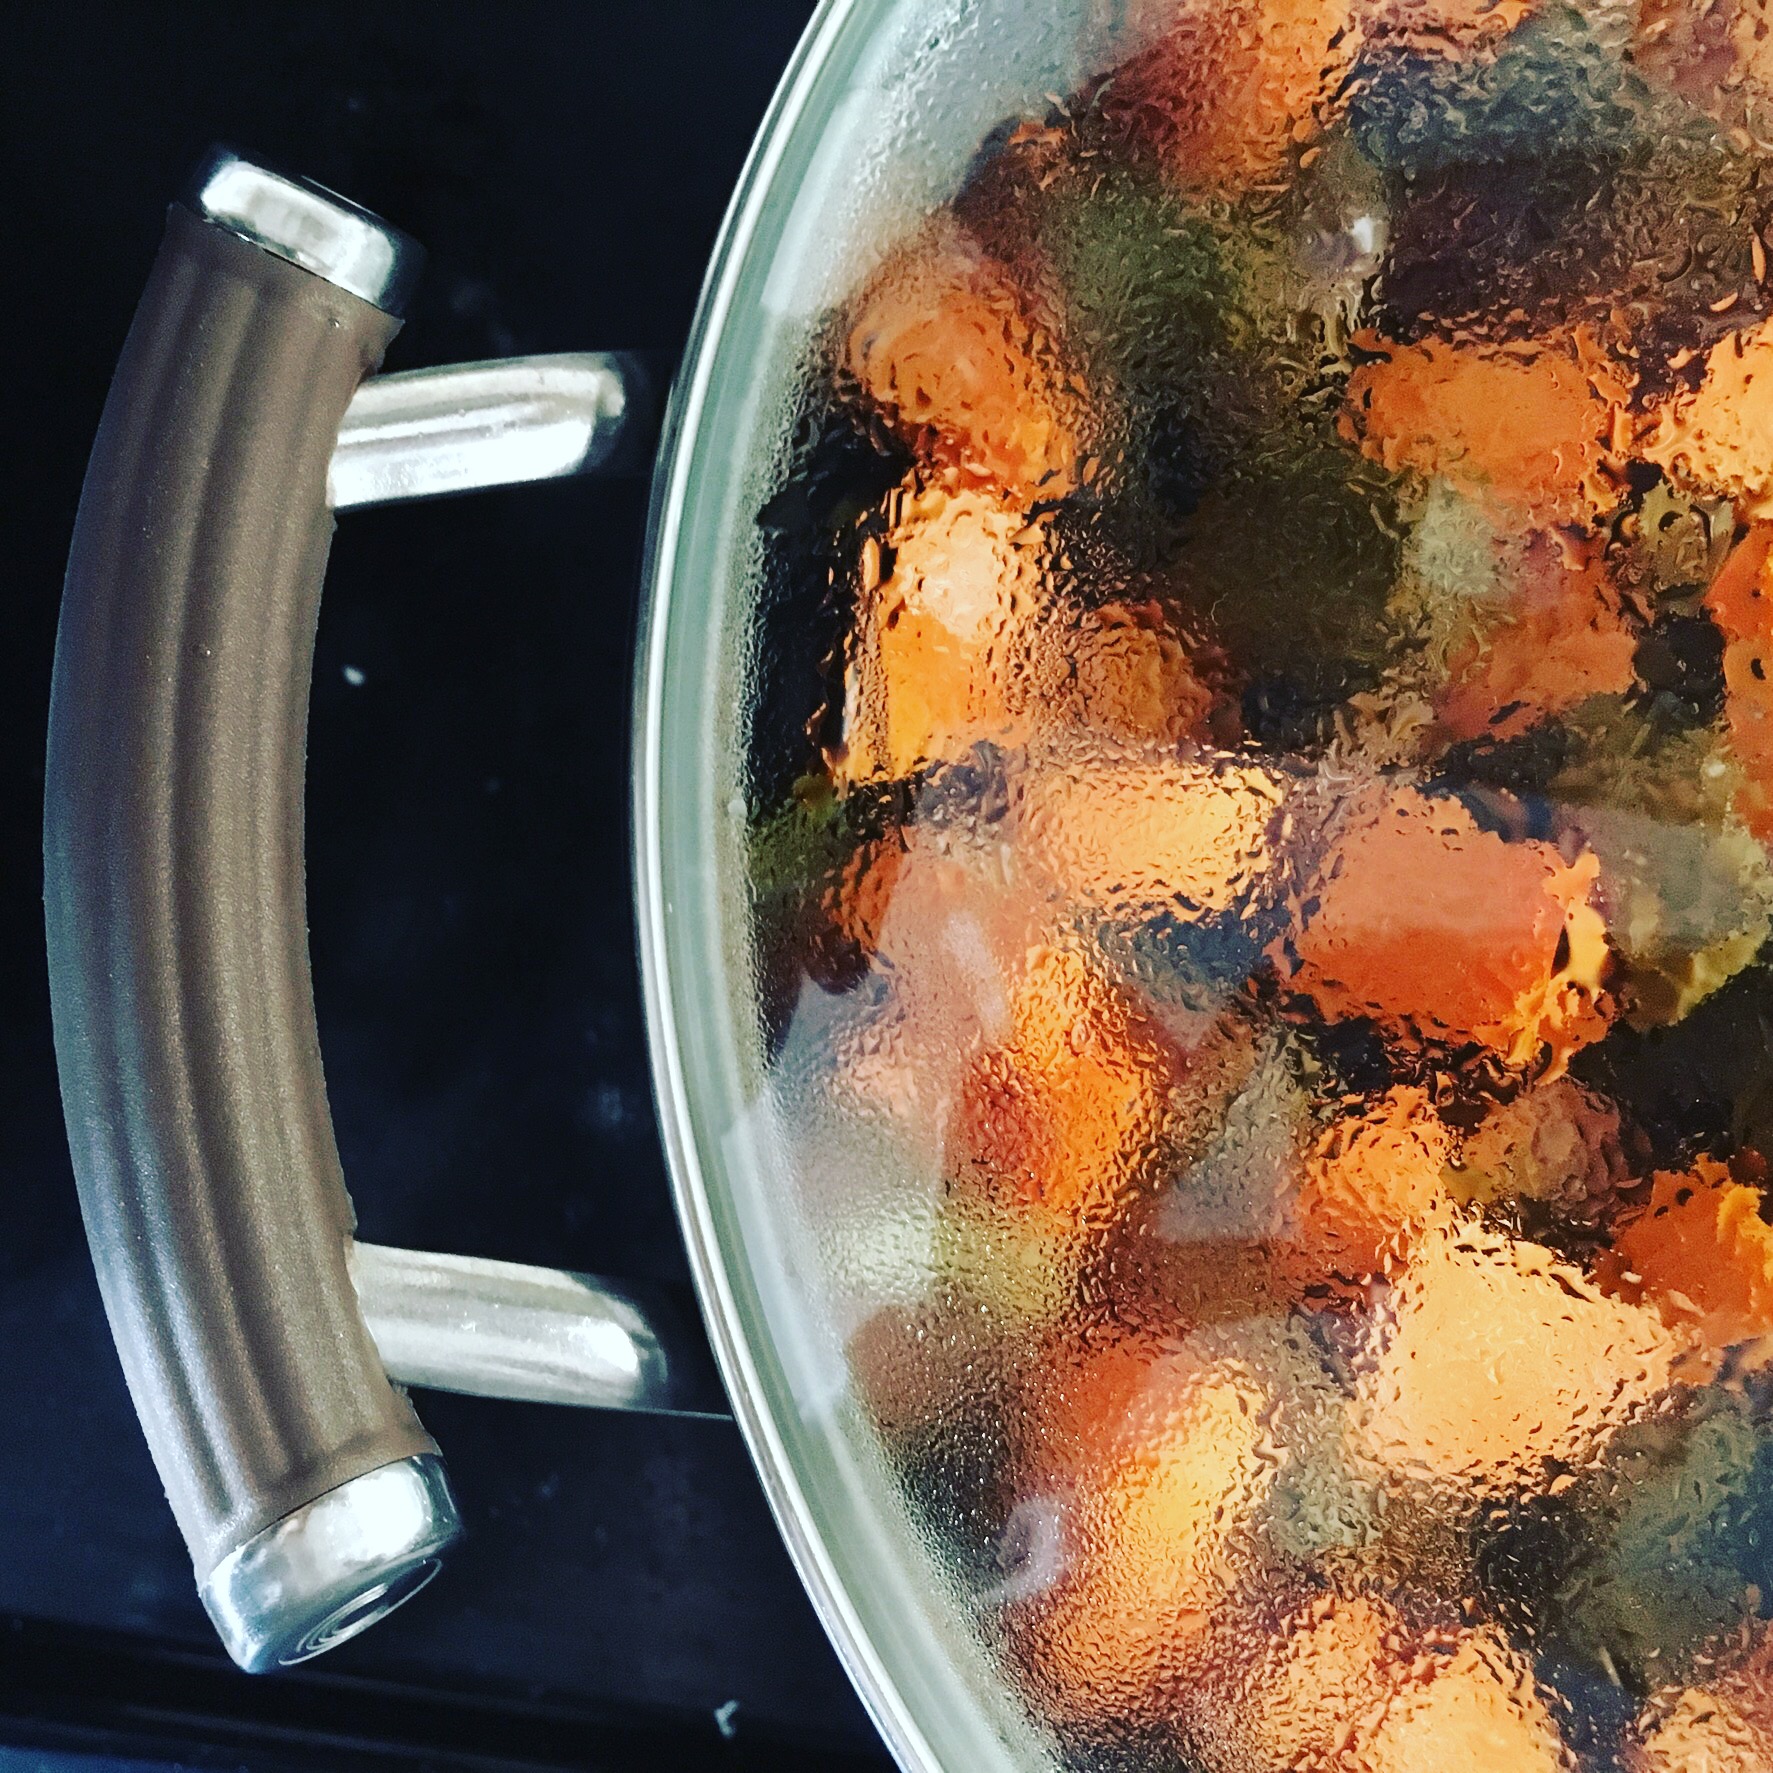
Uncover the meat & potatoes, add bell pepper & allow to saute uncovered for 3-5 minutes.IMG_6489IMG_2700Next add in the more delicate vegetables, like mushrooms and bok choy. Put curry paste & additional curry powder to taste. I usually add 2-3 tbsp of paste & an additional 1 tspb of curry powder. Allow the vegetables & seasonings to cook uncovered for approx 4 minutes.
Finally, add in two cans of coconut milk and bring to low boil. Making sure all the curry paste has dissolved. Adjust for taste, adding more paste or powder as needed. Allow to cook at a low simmer for approx 10 minutes. Serve hot over rice.

If you try to recreate this recipe I’d love to hear about it in the comments below!

Thai Red Curry

  • Servings: 4-6
  • Print

Ingredients

  • 1 Sweet potato
  • 1 package of stew meat or protein of choice.
  • 2 cups of sliced mushrooms
  • 1 red bell pepper, chopped
  • 1 green bell pepper, chopped
  • 1 large baby bok choy, chopped
  • ½ yellow onion, chopped.
  • 1 tbsp curry powder
  • 2 cloves garlic, minced.
  • 2 tsp of turmeric
  • 2-3 tbsp of Thai Curry Paste 
  • 2 cans of coconut milk

Directions

Sliced protein to desired bite size pieces, I find the stew meat often needs to be cut into smaller pieces & usually trimmed of some fat. Season meat with: salt, pepper, curry powder (2 tsp), garlic powder & a few dashes of turmeric. Place meat in fridge to marinate.

While the meat marinates, chop all the veggies & set aside.

In a large skillet or large pan, over medium high heat begin sauteing onions, garlic and meat. Once meat begins to brown add in sweet potato. I try to add the vegetables in order of which takes the longest to cook. Once the sweet potatoes have been sauteing for 3-4 minutes along with the meat, add in bell peppers and allow to cook for additional 3-4 minutes, stirring occasionally.

Once the vegetables have started to cook, add in the curry paste, curry powder & turmeric, as well as the remaining mushrooms & bok choy. Let this cook for approx 3 minutes, stirring in seasoning and curry paste.

Add in coconut milk, bring to light boil & then decrease heat and cover for 15 minutes. Taste for flavor & adjust if more curry powder or paste are needed.

Serve hot over rice.

String art tutorial 

  
Four years ago I made this Texas string art  for Chris’ birthday;  It was a surprisingly easy project that turned out great  & now I’ve inally gotten around to make the California counterpart. Whether you’re gifting this for the holidays or hanging it in your own home it’s sure to get plenty of compliments.


Materials

  • Wood board – I used this one here from Michaels
  • 1″ nails (2 packs recommended)
  • Paint
  • Foam brush
  • Hammer
  • String
  • Outline of map or design you plan to use

Directions

  1. Paint wood board – allow to dry completely – I used two coats of paint. Once the paint has dried completely tape the outline of the state in the desired place.

 2. Begin hammering nails following your outline – I found it easier to start with a nail at each corner and then adding nails spaced apart, rather than trying to hammer them all close together in the beginning. Also I recommend hammering the heart in first  otherwise it’ll be much more difficult & awkward if the state is already outlined to try and squeeze the heart in.    3. Take the string and start at a corner, make a small knot to secure the string to an outer nail, and begin looping the string around the nails of the heart. I found out the Texas state outline was somewhat easier than california just based on the shape of the state. It may take a few tries to figure out the best number of times to wrap the string around the inner nails.  *Note – not all the nails will have string wrapped around – in the picture below you can see how  some of the nails on the curve inward on the southern end have been skipped.


4. Once you have completed the final loop  make another small knot to secure the string, and you’re done & ready to display!

This project will run you about $20 -$25 and makes a perfect gift! Have you made your own string art? if so I’d love to hear about it!

LIVF21492817007

Last Minute Gift Guide!

Holiday gift giving can always be a little stressful especially as Christmas gets closer. Whether you’re searching for a gift for a friend, coworker, in-law or secret Santa, this guide is sure to have something for everyone on your list! This guide also contains DIY projects that make excellent low cost gifts, personal gifts.

DIY Terrarium – This is an easy inexpensive project that makes for an impressive gift. Also, it’s a great gift even for someone who is worried about killing plants, you can place air plants or succulents which are super low maintenance & nearly impossible to kill. Just remind them to mist once a week & keep in indirect sunlight! Find the tutorial here!

Kate Spade Studs

Kate Spade small square studs $48  here. These square studs come in a variety of colors, my personal favorite are these blush pink ones. These make for a great girly gift. Who doesn’t like receiving one of those precious Kate Spade boxes?

img_5925-1

DIY Scented Candles – follow the tutorial here to make an easy handmade gift that’ll impress anyone on your list!


vase

Set of 3 Painted Wooden Vases here $46 . These vases are neutral enough to add a cute accent to any home or apartment.

patent prints

Patent Prints – This etsy shop has poster of patents for everything under the sun. I purchased a set of golf club patent prints for my brother.  You’re sure to find something for everyone at this shop, whether it’s kitchen decor, or a Lego patent for the play room. This shop offers unique gifts for someone who has everything.


 DIY String Art – This DIY tutorial is an easy gift that anyone will love. I first made the Texas state one for my husbands birthday when we first were dating & he LOVED it. I finally got around to making the California one, they hang side by side in our hallway & they’re constantly getting complimented! Here’s the tutorial for how to make this awesome decor piece for less than $25!


On the go Gulpy – This ingenious product is the perfect gadget for any dog owner on your Christmas list! We used to have to carry around a water bottle for the dog plus a little bowl. inevitably the bowl would get knocked over or the puppy would chew through it when we weren’t watching. We use this anytime we’re taking the dog out for hikes or even just on a road trip. This was a game changer, I guarantee any dog owner will love this gift!

Spiralizer – – This was an item that was on our wedding registry that I ached for! I use the spiralizer about once a week to make my “faux carb” pastas. It’s an easy way to create healthy low carb meals. This is the perfect gift for someone who loves kitchen gadgets. William Sonoma also offers the spiralizer with a companion cookbook, however if you don’t want to spring for that, a quick search on pinterest can land you hundreds of recipes. Find it here!

cutting board

Personalized cutting boards. Anything from family names, monograms to breaking bad boards! These make great gifts for the newlywed couple on your holiday list!


Wedding Card Keepsake

For those newlyweds out there trying to decide what to purge and what to save from the post wedding madness, this is a compact way to hold on to all the well wishes from your guests. All you need is a mini binder, a hole punch & about 40 minutes.


After our wedding there were so many odds & ends to handle, aside from changing my name, storing my dress etc. We had a pile of wedding cards from friends family that I couldn’t bring myself to toss. So they sat on a pile of other wedding leftovers that don’t have a home in our apartment yet…

Typically I am not one to save all my cards, I usually scan meaningful cards and incorporate them in the annual photo album I make, but for our wedding cards that seemed excessive. Instead, I purchased a small binder from Target & punched holes in the cards. There were a handful of cards that couldn’t be punched through because of their design so I added a small pocket on the inside of the binder to keep those cards safe. The binder found a home in the box holding onto the rest of the wedding mementos. All in all this project took me about 40 minutes & cost about $5!